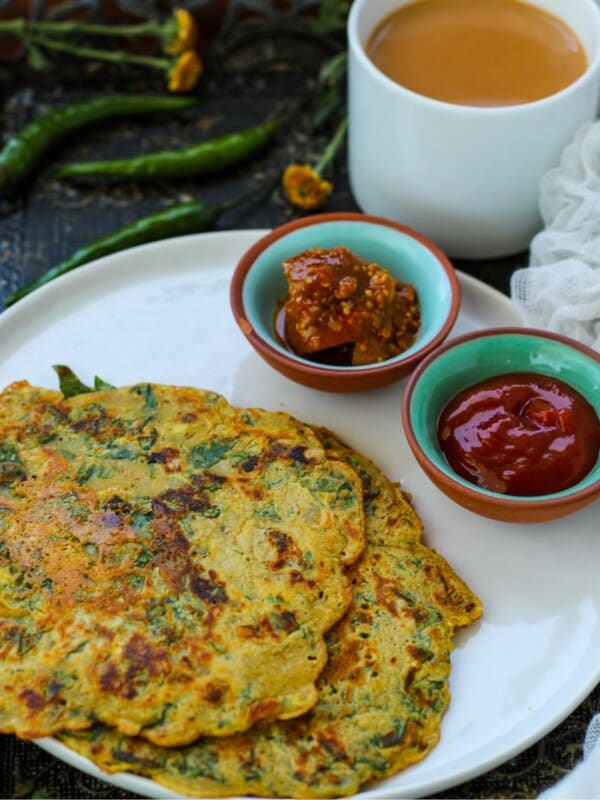
• Skip to main content
  • Skip to primary sidebar
  • Skip to footer

Honey, Whats Cooking

menu icon
go to homepage
  • Recipes
  • Fall Recipes
  • Shop
  • About
  • Subscribe
    • Facebook
    • Instagram
    • YouTube
  • subscribe
    search icon
    Homepage link
    • Recipes
    • Fall Recipes
    • Shop
    • About
    • Subscribe
    • Facebook
    • Instagram
    • YouTube
  • ×
    Home » Recipes

    Posts

    A spoonful of basmati rice and green moong dal with 2 bowls of rice and lentils in the background.

    October 2, 2023 Dal

    Green Moong Dal (Sabut Moong Dal)

    Green Moong Dal (Sabut Moong Dal) also known as Green Gram or Mung Beans is high in antioxidants and one of the healthiest dals. Make a large pot of dal on a cold night and enjoy it for days with hot basmati rice. Super comforting and nourishing.

    A spoonful of basmati rice and green moong dal  with 2 bowls of rice and lentils in the background.

    ★★★★★
    "Delicious, everyone loved it. I have tried so many recipes from Nisha's Instagram and have never been disappointed. This piping hot dal on a cold winter night is the best meal ever."
    - Tanya


    Dal is a staple in Indian cuisine. Given the variety of lentils, it's normal for someone of Indian origin to enjoy a different type of dal every single day of the week.

    Here are some Dal Recipes

    Looking for an easy weeknight dinner, make this Instant Pot Masoor Dal with Spinach - it tastes amazing with rice. For a light and tangy dal, make this delicious Tomato Dal or Andhra Style Tomato Pappu. For a comforting and hearty dal, this Spinach Dal Fry made with toor dal is healthy and wholesome. On a cold winter night, make this No Cream Dal Makhani - it's rich and made without heavy cream.


    [feast_advanced_jump_to]

    What is Green Moong Dal?

    Green Moong Dal is also known as Sabut Moong Dal. Sabut means "whole" in Hindi, so essentially this dal is also known as whole moong dal. Other names include Green Gram Curry, Mung Beans Curry, Green Gram Dal, or Hare Mung Dal.

    The Mung Beans are first soaked for at least 5 hours and then cooked in an Instant Pot or you can use a pressure cooker. In a separate pot, cook the ginger, garlic, onions, and tomatoes - this is your masala paste. Add the cooked lentils to the masala along with water, spices, and tadka (tempering). Enjoy with Jeera Rice.

    Why You'll Love This Recipe

    • Satisfying and comforting meal on a cold night.
    • Healthy with 20 grams of protein per serving.
    • Easy to make with simple ingredients.
    • Can easily be made vegan and gluten-free with a few minor swaps.

    Ingredients

    • Green Moong Dal / Mung Lentils - I used whole green moong beans or mung beans.
    • Ginger, Garlic, and Green Chilies - Chop the ginger and garlic. Slit the green chilies.
    • Onions - I love using chopped red onions for most of my Indian dishes.
    • Powdered Spices - Hing (asafoetida), Kashmiri Red Chili Powder, Turmeric Powder, Coriander Powder, Salt, Garam Masala, Amchur (mango powder).
    • Whole Spices - Cumin Seeds, Ajwain (carom seeds), Black Cardamom.
    • Avocado Oil - I recommend a high-heat oil for Indian cooking.
    • Water - You'll need water for soaking and cooking the lentils.
    • Ghee - you will need ghee for tempering, you can also use oil instead.
    • Sliced Garlic - you will need sliced garlic for tempering.
    • Fresh Cilantro - chopped cilantro leaves or coriander leaves.
    • Lemon Juice - just a squeeze of lemon juice or lime juice works too.

    Substitutions

    For a vegan option - simply replace ghee with avocado oil.

    For a gluten-free option - replace hing (asafoetida) with gluten-free hing.


    How to Make Green Moong Dal Recipe?

    Step 1 - Soak & Pressure Cook Sabut Moong Dal

    1. Wash and rinse 1 ½ cups of green moong dal well. Then soak the sabut moong dal in enough water for 5 hours. I generally soak the dal in 4 times the water amount. (Image 1)

    2. Then drain the dal. Wash and rinse it well. Add the dal to the Instant Pot along with 4 cups of water. Add salt and turmeric powder. Stir. (Image 2)

    3. Cook on High Pressure for 18 minutes and do a natural pressure release. (Image 3)

    4. Once done, this is what you should have. Perfectly cooked dal. (Image 4)

    Cook green moong dal in the instant pot.

    Step 2 - Prepare Masala & Add Cooked Mung Beans

    1. Heat up a pot on medium heat, then add oil. Once the oil is hot, add cumin seeds, ajwain (carom seeds), hing (asafoetida), turmeric powder, and black cardamom. Saute for a minute. (Image 1)

    2. Then add ginger, garlic, and green chilies. Saute for 1-2 minutes. (Image 2)

    3. Add onions and season with salt. Cook for around 5 minutes until the onions are translucent and golden brown. (Image 3)

    4. Add chopped tomatoes and season with salt. (Image 4)

    Add oil, whole spices, ginger, garlic, chilies, onions, and tomatoes and saute until well combined.

    5. Stir the tomatoes. (Image 5)

    6. Cover and cook the onion tomato masala on low-medium heat for 6-7 minutes until you have a paste-like consistency. (Image 6)

    7. Now add your powdered spices - red chili powder and coriander powder. Also, add a ¼ cup of water to prevent the spices from burning. (Image 7)

    8. Stir and cook for a minute. (Image 8)

    Cover and cook onion tomato mixture, then add powdered spices and cook for a minute.

    9. Now add your cooked dal. Note, there won't be much liquid in here since the lentils will soak up the water. (Image 9)

    10. Also add 1 cup of water. Stir. Adjust salt as needed. (Image 10)

    11. Cover and cook on low-medium heat for 10 minutes. (Image 11)

    12. This is what you should have. Turn off the stove. (Image 12)

    Add cooked green moong dal and water, cover and cook until creamy.

    Step 3 - Prepare the Takda (tempering)

    1. Add ghee (or oil if you prefer) to a small pan/pot. Heat ghee. Then add hing, sliced garlic, and Kashmiri red chili powder. Cook for about 2 minutes until you can smell the aroma of the garlic. (Image 1)

    2. Pour tadka over dal. Stir. (Image 2)

    3. Now add amchur powder (mango powder), garam masala, and fresh lemon juice. Stir. (Image 3)

    4. Add fresh cilantro. Turn off the stove. Stir. Enjoy with basmati rice. (Image 4)

    Prepare tadka (tempering) with oil, garlic, chili powder, and asafoetida, season with fresh cilantro, and more spices.

    Expert Tips

    In order to get a creamy consistency when making Green Moong Dal, you need to:

    ✓ Soak - Soak the sabut moong dal for at least 5 hours in lots of water.
    ✓ Water - Pressure cook the dal with the least amount of water so the consistency is not water.
    ✓ Ghee - Finish off with a ghee tadka. You can use oil instead of ghee, but the richness ghee adds is different.


    Serving Suggestions

    → Jeera Rice - Mung Beans Curry tastes best with Jeera Rice or plain white basmati rice.

    → Brown Rice / Quinoa - for a healthier option, you can use brown rice or quinoa.

    → Roti / Sabzi - To complete a typical Indian meal, Sabut Moong Dal can be served as an accompaniment with roti and sabzi.


    Recipe FAQs

    Is this Sabut Moong Dal recipe vegan?

    No. For a vegan option, simply replace the ghee tadka with avocado oil.

    Is this recipe gluten-free?

    No. For a 100% gluten-free option, you need to use a gluten-free hing (asafoetida). Every other ingredient in this recipe is gluten-free.

    Can I soak the Green Moong Dal longer than 5 hours?

    Sure. You can soak it for 5 hours or even overnight.

    How do I store green moong dal?

    Generally speaking, dal can be stored in the fridge in an airtight glass container for up to 3-4 days.

    If I make a lot of dal, I do freeze it in a Pyrex airtight container and use it within a month or two. Transfer the frozen dal to the refrigerator a day before and it will thaw. Heat up the dal as usual the next day.

    Is Green Moong Dal healthy?

    Yes, Green Moong Dal Curry also known as Mung Beans is one of the healthiest dals packed with protein and fiber.

    Here are some benefits of green gram:
    → Ideal for weight loss because it is loaded with high-quality protein and fiber. This type of dal keeps you fuller for longer.
    → Good for your digestive health.
    → Has a low glycemic index so it doesn't spike your blood sugar levels making it ideal for diabetics.
    → Mung beans are high in antioxidants.


    A serving dish with green moong dal topped with sliced onions, cilantro, and Thai green chilies.

    More Dal Recipes

    • Masoor Dal Instant Pot (Red Lentils Dal)
    • Dal Makhani (no cream, gluten-free)
    • Andhra Style Tomato Dal Tomato Pappu
      Tomato Dal | Andhra Style Tomato Pappu Recipe
    • Instant Pot Toor Dal / Split Pigeon Peas

    Tried this recipe? If so, please leave a comment & rate this recipe. That would mean so much to me. If you’re on Instagram, please tag me so I can see your creations. I'm happy to share and mention you. Thank you!


    📖 Recipe Card

    A spoonful of basmati rice and green moong dal with 2 bowls of rice and lentils in the background.
    Print Recipe
    5 from 4 votes

    Green Moong Dal (Sabut Moong Dal)

    Green Moong Dal also known as Green Gram or Mung Beans is high in antioxidants and one of the healthiest dals. This dal is made with ginger, garlic, tomatoes, onions, and Indian spices.
    Prep Time20 minutes mins
    Cook Time30 minutes mins
    Total Time50 minutes mins
    Course: Main Course
    Cuisine: Indian
    Diet: Vegetarian
    Servings: 4 servings
    Calories: 408kcal
    Author: Nisha

    Equipment

    • Instant Pot
    • Tadka Pot

    Ingredients

    for pressure cooking dal

    • 1 ½ cups green moong dal (mung beans) washed, rinsed & soaked
    • 4 cups water
    • ½ teaspoon turmeric powder
    • 1 teaspoon salt

    for cooking dal & spices

    • 2 tablespoon avocado oil
    • 1 black cardamom moti elachi
    • 1 teaspoon cumin seeds
    • ½ teaspoon carom seeds ajwain
    • ⅛ teaspoon hing asafoetida
    • ½ teaspoon turmeric powder
    • 1 inch ginger chopped
    • 4 cloves garlic chopped
    • 2 green chilies slit
    • 1 large onion chopped
    • 2 plum tomatoes chopped
    • 2 teaspoon coriander powder
    • ½ teaspoon red chili powder
    • add cooked dal
    • 1 cup of water
    • 1 teaspoon garam masala
    • 1 teaspoon amchur mango powder
    • ¼ cup fresh cilantro more if needed
    • squeeze of fresh lemon juice

    for tadka (tempering)

    • 1 tablespoon ghee
    • ⅛ teaspoon asafoetida (hing)
    • 3 cloves garlic sliced
    • ½ teaspoon Kashmiri red chili powder

    Instructions

    Step 1 - Soak & Pressure Cook Sabut Moong Dal

    • Wash and rinse 1 ½ cups of green moong dal well. Then soak the sabut moong dal in enough water for 5 hours. I generally soak the dal in 4 times the water amount.
    • Then drain the dal. Wash and rinse it well. Add the dal to the Instant Pot along with 4 cups of water. Add salt and turmeric powder. Stir. Cook on High Pressure for 18 minutes and do a natural pressure release.

    Step 2 - Prepare Masala & Add Cooked Mung Beans

    • Heat up a pot on medium heat, then add oil. Once the oil is hot, add cumin seeds, ajwain (carom seeds), hing (asafoetida), turmeric powder, and black cardamom. Saute for a minute. Then add ginger, garlic, and green chilies. Saute for 1-2 minutes.
    • Add onions and season with salt. Cook for around 5 minutes until the onions are translucent and golden brown. Next, add tomatoes, season with salt, and stir.
    • Cover and cook the onion tomato masala on low-medium heat for 6-7 minutes until you have a paste-like consistency.
    • Next, add your powdered spices - red chili powder and coriander powder. Also, add a ¼ cup of water to prevent the spices from burning. Stir and cook for a minute.
    • Add the cooked dal. Note, there won't be much liquid in here since the lentils will soak up the water. Add 1 cup of water. Stir. Adjust salt as needed. Cover and cook on low-medium heat for 10 minutes. Turn off the stove.

    Step 3 - Prepare the Takda (tempering)

    • Add ghee (or oil if you prefer) to a small pan/pot. Heat ghee. Then add hing, sliced garlic, and Kashmiri red chili powder. Cook for about 2 minutes until you can smell the aroma of the garlic. Pour tadka over dal. Stir.
    • To the dal - add amchur powder (mango powder), garam masala, and fresh lemon juice. Stir. Add fresh cilantro. Turn off the stove. Stir. Enjoy with basmati rice.

    Notes

    This recipe was first published in November 2022, and has since been updated.
    • Soak - Soak the sabut moong dal for at least 5 hours in lots of water.
    • Water - Pressure cook the dal with the least amount of water so the consistency is not water.
    • Ghee - Finish off with a ghee tadka. You can use oil instead of ghee, but the richness ghee adds is different.
    • Vegan option - Replace ghee with oil.
    • Gluten-free option - Replace asafoetida (hing) with gf hing, or skip it.

    Nutrition

    Calories: 408kcal | Carbohydrates: 58g | Protein: 20g | Fat: 12g | Saturated Fat: 3g | Cholesterol: 10mg | Sodium: 693mg | Potassium: 1150mg | Fiber: 15g | Sugar: 8g | Vitamin A: 563IU | Vitamin C: 15mg | Calcium: 139mg | Iron: 6mg
    A bowl of oats kheer with a spoonful of kheer above with flowers in the background.

    September 27, 2023 American

    Oats Kheer (Oats Payasam with Steel Cut Oats)

    Delicious Oats Kheer also known as Oats Payasam is made with healthy steel-cut oats in the Instant Pot, but it tastes just like kheer. This quick and easy oats kheer is flavored with cardamom, saffron, ghee, and nuts. A perfect way to start your day!

    A bowl of oats kheer with a spoonful of kheer above with flowers in the background.

    ★★★★★
    "After seeing Nisha’s post on Insta, I made this oats kheer right away. It’s a perfect bowl of warm hugs in the rainy weather we’ve been having in NJ. So healthy, easy, and yummy. I sneaked extra nuts in mine. Def recommend it."
    - Payal


    I am an Oatmeal Lover and it's a staple for breakfast. As the seasons change, I love changing the flavors of my oatmeal.

    Many of you have DM'd me on Instagram requesting my Instant Pot oatmeal recipe that's made with steel-cut oats so sharing with you my favorite way to enjoy oatmeal - in kheer form.

    More Oats Recipes

    Love overnight oats? Then try this quick & easy vegan Peanut Butter Banana Overnight Oats. Want oatmeal leftovers - try this Apple Pie Baked Oatmeal or Baked Carrot Cake Oatmeal. For some fall muffins, try these Pumpkin Oat Muffins loaded with nutrition.


    [feast_advanced_jump_to]

    What is Oats Kheer?

    Kheer also known as Rice Kheer is an Indian rice pudding that's made with ghee, milk, rice, nuts, and raisins, along with flavors such as cardamom powder, saffron, or rose water.

    Kheer is one of the most popular Indian Desserts during the Diwali season so this is the perfect time to share my Oats Kheer or Oats Payasam recipe.


    Why You'll Love This Recipe

    • Tastes like kheer - seriously!
    • A healthy way to enjoy kheer.
    • Made with basic ingredients in your pantry.
    • A delicious & cozy breakfast for the fall & winter months.
    • Refined sugar-free - this recipe calls for coconut sugar.
    • It's naturally gluten-free.

    Ingredients

    Ingredients for Oats Kheer.
    • Steel-Cut Oats - I highly recommend using steel-cut oats because it tastes delicious and I love the texture of it in this recipe. Feel free to use old-fashioned oats if you wish, however do not use quick oats or instant oats as they turn mushy very fast.
    • Whole Milk - For this recipe, use whole milk. You'll need ½ cup to cook the oats and another ½ cup after the oats are cooked.
      Alternatively, reduced-fat 2% milk would be great too. Low-fat 1% and skim milk are great options too, however the texture won't be as creamy.
    • Nuts - I love the classics - cashews, almonds, and pistachios. Just make sure you chop the nuts.
    • Ghee - You'll need a ½ tablespoon of ghee which adds a rich taste. Feel free to use butter instead, however butter doesn't have that nutty flavor that ghee has.
    • Coconut Sugar - For a healthier refined sugar-free option, I love using coconut sugar instead of plain sugar and it tastes great too. I only used 1 tablespoon of coconut sugar because you really don't need that much, feel free to adjust to your taste buds. Additionally, brown sugar will work too.
    • Desi Flavors - A pinch of saffron strands (kesar) and a touch of cardamom powder (or crushed green cardamoms) are all you need for that Desi touch.
    • Water - You'll need some water to cook the oats along with some milk.

    *See the recipe card below for full information on ingredients and quantities.*


    Substitutions

    • Whole Milk - For a dairy option, you may substitute regular milk for reduced-fat 2% milk, but I would avoid low-fat 1% milk and skim milk.
    • Vegan - For a vegan option, use nondairy milk such as unsweetened almond milk, coconut milk, or cashew milk. Instead of ghee, use vegan ghee.
    • Nuts - If allergic to nuts or don't want to add them in, skip the nuts.
    • Steel-Cut Oats - This recipe is amazing with steel-cut oats, however you can substitute old-fashioned oats and cook for 2 minutes in the Instant Pot and let the pressure naturally release.
    • Dry Fruits - If you love raisins, add golden raisins or even dried cranberries.
    • Healthier Additions - Feel free to add chia seeds or ground flax seeds to this oats kheer.

    How to Make Oats Kheer Recipe

    1. In an Instant Pot - press SAUTE. Once hot, add ghee. (Image 1)

    2. Heat ghee. Once the ghee melts, add steel-cut oats. (Image 2)

    3. Saute for a minute or two until toasty and you can smell the nutty aroma of the ghee and oats. (Image 3)

    4. Press CANCEL on the Instant Pot. Add water and ½ cup of milk at this time. Stir. (Image 4)

    In the Instant Pot saute steel-cut oats with ghee, add milk, and water.

    5. Add coconut sugar. Stir. (Image 5)

    6. Cover and close the Instant Pot. Cook on HIGH PRESSURE for 5 minutes and let the oats naturally release for 10 minutes, then do a manual pressure release. (Image 6)

    Add coconut sugar, close the lid, and high pressure for 5 minutes.

    7. Once done, this is what you should have. (Image 7)

    8. Add another ½ cup of milk to your oats. (Image 8)

    9. Stir and cook for a minute until the milk warms up. (Image 9)

    10. Now add cardamom powder, a pinch of saffron (kesar), and your chopped almonds, pistachios, and cashews. (Image 10)

    Once oats are cooked, add more milk followed by cardamom powder, saffron threads, and nuts.

    11. Give it another stir. (Image 11)

    12. After a minute, the milk will start to bubble. Press CANCEL on the Instant Pot. (Image 12)

    13. Cover the pot with a lid for a couple of minutes for the oats to thicken up slightly. (Image 13)

    14. Garnish with additional nuts and a few strands of saffron. Enjoy hot! (Image 14)

    Cook the oats for a minute and cover with a lid once done, enjoy hot.

    Expert Tips

    ✓ Milk - Add ½ cup of milk once the oats are done cooking and just heat up for a minute. If you prefer less runny oatmeal, cook the oatmeal longer. Feel free to add more milk for your desired consistency.

    ✓ Cover Oats Kheer - Once you add the nuts and flavors. Cook for a minute, press CANCEL on the Instant Pot, and cover with a lid. The oats will thicken up slightly.

    Serving Suggestions

    → Garnish with additional nuts - almonds, cashew nuts, or pistachios.

    → Enjoy with a side of berries.


    Recipe FAQs

    Are Oats Kheer gluten-free?

    Yes. This recipe is completely gluten-free.

    Is this recipe vegan?

    No. For a vegan option use vegan ghee and nondairy milk. See notes below.

    If I want to add rose to my oats kheer, how much rose water should I add?

    Start with a ¼ teaspoon of rose water, and up to ½ a teaspoon. The flavor can be overpowering so add a little at a time.

    How long will oats kheer last in the fridge?

    Store the oats kheer in an air-tight container and it'll last in the fridge for up to two days.


    A bowl of oats kheer with a golden spoon with a few flowers in the background.

    Similar Recipes

    • Rice Kheer | Indian Rice Pudding (6 ingredients, gluten-free)
    • Peanut Butter Banana Oats Featured Image
      Peanut Butter Banana Overnight Oats (healthy, creamy)
    • Baked Carrot Cake Oatmeal
      Baked Carrot Cake Oatmeal (healthy)
    • Apple Pie Baked Oatmeal (healthy, high fiber, dairy free, refined sugar free)

    Tried this recipe? If so, please leave a comment & rate this recipe. That would mean so much to me. If you’re on Instagram, please tag me so I can see your creations. I'm happy to share and mention you. Thank you!


    📖 Recipe Card

    A bowl of oats kheer with a spoonful of kheer above with flowers in the background.
    Print Recipe
    5 from 4 votes

    Oats Kheer (Oats Payasam with Steel Cut Oats)

    Delicious Oats Kheer also known as Oats Payasam is made with healthy steel-cut oats in the Instant Pot, but it tastes just like kheer. This quick and easy oats kheer is flavored with cardamom, saffron, ghee, and nuts. A perfect way to start your day!
    Prep Time5 minutes mins
    Cook Time10 minutes mins
    Total Time15 minutes mins
    Course: Breakfast & Brunch
    Cuisine: Indian-Inspired
    Diet: Gluten Free, Vegetarian
    Servings: 2 servings
    Calories: 344kcal
    Author: Nisha

    Equipment

    • Instant Pot

    Ingredients

    Before high pressure

    • ½ tablespoon ghee, solid
    • ½ cup steel cut oats
    • 1 cup water
    • ½ cup whole milk
    • 1 tablespoon coconut sugar

    After high pressure

    • ½ cup whole milk
    • ¼ teaspoon cardamom powder
    • pinch of saffron
    • 1 tablespoon pistachios chopped
    • 1 tablespoon cashews chopped
    • 1 tablespoon almonds chopped

    Instructions

    • In an Instant Pot - press SAUTE. Once hot, add ghee.
    • Heat ghee. Once the ghee melts, add steel-cut oats.
    • Saute for a minute or two until toasty and you can smell the nutty aroma of the ghee and oats.
    • Press CANCEL on the Instant Pot. Add water and ½ cup of milk at this time. Stir.
    • Add coconut sugar. Stir.
    • Cover and close the Instant Pot. Cook on HIGH PRESSURE for 5 minutes and let the oats naturally release for 10 minutes, then do a manual pressure release.
    • Once done, this is what you should have.
    • Add another ½ cup of milk to your oats.
    • Stir and cook for a minute until the milk warms up.
    • Now add cardamom powder, a pinch of saffron (kesar), and your chopped almonds, pistachios, and cashews.
    • Give it another stir.
    • After a minute, the milk will start to bubble. Press CANCEL on the Instant Pot.
    • Cover the pot with a lid for a couple of minutes for the oats to thicken up slightly.
    • Garnish with additional nuts and a few strands of saffron. Enjoy hot!

    Notes

    • Whole Milk - For a dairy option, you may substitute regular milk for reduced-fat 2% milk, but I would avoid low-fat 1% milk and skim milk.
    • Vegan - For a vegan option, use nondairy milk such as unsweetened almond milk, coconut milk, or cashew milk. Instead of ghee, use vegan ghee.
    • Nuts - If allergic to nuts or don't want to add them in, skip the nuts.
    • Steel-Cut Oats - This recipe is amazing with steel-cut oats, however you can substitute old-fashioned oats and cook for 2 minutes in the Instant Pot and let the pressure naturally release.
    • Dry Fruits - If you love raisins, add golden raisins or even dried cranberries.
    • Healthier Additions - Feel free to add chia seeds or ground flax seeds to this oats kheer.
    • Add Milk to Cooked Oats - Add ½ cup of milk once the oats are done cooking and just heat up for a minute. If you prefer less runny oatmeal, cook the oatmeal longer. Feel free to add more milk for your desired consistency.
    • Cover Oats Kheer - Once you add the nuts and flavors. Cook for a minute, press CANCEL on the Instant Pot, and cover with a lid. The oats will thicken up slightly.

    Nutrition

    Calories: 344kcal | Carbohydrates: 41g | Protein: 12g | Fat: 17g | Saturated Fat: 6g | Cholesterol: 24mg | Sodium: 65mg | Potassium: 294mg | Fiber: 5g | Sugar: 10g | Vitamin A: 213IU | Vitamin C: 0.3mg | Calcium: 194mg | Iron: 2mg
    Baked Eggplant Parmesan Pasta topped with cheese and julienned basil.

    September 18, 2023 Christmas

    Eggplant Parmesan Pasta (Baked Casserole)

    Eggplant Parmesan Pasta is a baked casserole made with whole wheat spaghetti and baked (not fried) eggplant parmesan. This dish is a healthier alternative to the real thing, and yes, it still tastes amazing. The whole wheat spaghetti adds some extra fiber to this dish. I promise you won't be able to tell the difference. Chef's Kiss all the way!

    Baked Eggplant Parmesan Pasta topped with cheese and julienned basil.

    ★★★★★
    "Tried this dish and it came out excellent! The entire family loved it and it was my first attempt at cooking with eggplant. I love your blog - I will definitely be trying more recipes."
    - Anonymous


    Eggplant Parmigiana is one of those dishes I refrain from ordering in a restaurant due to the unforeseen calories and fat. For this reason, I have my mom's healthier Baked (not fried) Eggplant Parmesan recipe on the blog.

    I took the "original" eggplant parm recipe one step further, added whole wheat spaghetti in Rao's Homemade Marinara, and baked it all together. The end result is a mindblowing baked casserole dish with a fraction of the calories.

    Similar Pasta Recipes

    If you love a baked pasta casserole, you must have my Vegetable Lasagna which is out of this world. A quick and easy casserole option is my Baked Ziti with Spinach. Want a low-carb option, try this Baked Eggplant Spinach Rollatini. For everyone's favorite 8-ingredient pasta dish, try my World's Best Spaghetti with Rao's Homemade Marinara.


    [feast_advanced_jump_to]

    Why You'll Love This Recipe

    • Baked Eggplant, NOT Fried. Get all that deliciousness without the extra fat and calories.
    • Made with whole wheat spaghetti which adds extra fiber and protein.
    • Prepared with store-bought Marinara sauce so it's easy and cuts down prep time.
    • Tastes just like the real thing and is the ultimate comfort food on a cold day.
    • Enjoy leftovers for up to 2 days and it still tastes amazing.

    Ingredients

    Ingredients for Eggplant Parmesan Pasta.

    For the Eggplant Bake

    • Eggplant - Slice the eggplant into ¼" slices. Anything larger, and I find the eggplant won't bake all the way.
    • All-Purpose White Flour - Use regular white flour, or for a gluten-free option, use white gluten-free flour.
    • Eggs - You'll need eggs to bind the flour and panko crumbs. If you prefer eggless, use milk instead.
    • Panko Crumbs with Seasonings - For the breadcrumb mixture, add panko crumbs and season with dried oregano, dried basil, garlic powder, salt, and black pepper. Mix well.

    For the Spaghetti & Sauce

    • Spaghetti (whole wheat) - I love using whole-wheat pasta, however feel free to use white pasta or gluten-free. Additionally, linguine, rigatoni, and penne would all work well here.
    • Marinara Sauce - I used 24 ounces of store-bought Marinara sauce since there are some great options nowadays. I love Rao's Marinara Sauce.
    • Garlic - A few cloves of chopped garlic.
    • Onions - You'll need chopped white onions.
    • Olive Oil - You'll need a couple of tablespoons of olive oil to enhance the flavor of the sauce.
    • Spices - Crushed Red Pepper Flakes, Salt, and Black Pepper.

    For Assembling

    • Cheese - Sliced Burrata and freshly grated Parmesan cheese.
    • Fresh Basil - Julienned fresh basil leaves.
    • Marinara Sauce - You'll need an additional 2 cups of jarred Marinara sauce to top over the eggplant slices and for the base of this dish.

    *See the recipe card below for full information on ingredients and quantities.*


    Substitutions

    • For gluten-free - use gluten-free white flour instead of all-purpose white flour. Use the gluten-free panko crumbs and gluten-free spaghetti.
    • For dairy-free - use non-dairy parmesan cheese and burrata. If you can't find non-dairy burrata, use non-dairy mozzarella cheese instead.
    • For egg-free eggplant parmesan - use almond milk or regular dairy milk in place of eggs.
    • For cheese - you may substitute fresh mozzarella cheese for burrata cheese. You should definitely use parmesan cheese though.
    • For whole wheat spaghetti - Instead of whole wheat spaghetti, you may use rigatoni or penne. Additionally, you can use whole wheat pasta of your choice.

    How to Make Eggplant Parmesan Pasta Recipe

    Step 1 - Bake the Eggplant

    1. Preheat oven to 400 degrees while you prep the eggplant. Add a tablespoon of olive oil to a large baking tray. (Image 1)

    2. Brush the olive oil all over. (Image 2)

    Brush olive oil on a baking tray.

    3. Slice eggplant into ¼-inch pieces. (Image 3)

    4. Dip the eggplant slices in all-purpose flour on both sides. Coat it well. (Image 4)

    5. Now dip the eggplant slice in eggs on both sides. Again, coat it well. (Image 5)

    6. Finally, dip the eggplant slice in the seasoned panko bread crumbs on both sides. Make sure to season the panko crumbs with garlic powder, dry oregano, dry basil, salt, and black pepper. (Image 6)

    Dip sliced eggplant on both sides in flour, eggs, and panko crumbs.

    7. Place the eggplant pieces on the greased baking tray. Bake for 35 minutes at 400 degrees - flipping halfway. (Image 7)

    8. Once done, the eggplant should be slightly golden brown. (Image 8)

    Place eggplant on a baking tray and bake.

    Step 2 - Prepare the Sauce & Spaghetti

    1. Boil a pot of water for the pasta. (Image 1)

    2. Once boiling, season well with salt. Add whole wheat spaghetti to the large pot of salted water. Follow the instructions on the back of the pasta box and cook pasta until al dente. (Image 2)

    Boil water for pasta, then add spaghetti and cook until al dente.

    3. Heat up a Dutch castiron on medium heat. Once hot, add two tablespoons of olive oil. (Image 3)

    4. Once the oil is hot, add crushed red pepper flakes. Cook for 30 seconds.(Image 4)

    5. Now add chopped garlic. Cook for 45 seconds or so. (Image 5)

    6. Add chopped onion and season with salt. Saute for 2-3 minutes until the onions are golden-brown. (Image 6)

    Prepare the sauce - saute crushed red pepper, garlic, and onions in olive oil.

    7. Add 24 ounces of Marinara sauce - I used Rao's Marinara. (Image 7)

    8. Season with black pepper. You really don't need salt since the sauce has enough. Cover and simmer the sauce for about 5 minutes. (Image 8)

    9. Once heated through, add the spaghetti to the sauce and toss until well coated. (Image 9)

    10. This is what you should have. (Image 10)

    Add store-bought marinara sauce and toss with cooked spaghetti.

    Step 3 - Assemble Eggplant Parm Pasta Bake

    Note: You'll need some additional ingredients - grated parmesan cheese, fresh burrata that's been sliced, freshly julienned basil, and another 2 cups of Marinara sauce straight from the jar (again, I used Rao's Homemade Marinara).

    1. Add ½ cup of Marinara sauce to the bottom of the baking dish. (Image 1)

    2. Transfer all the spaghetti to the baking dish. (Image 2)

    3. Place 6 crispy eggplant slices (or more if your baking dish is wider) over the spaghetti. (Image 3)

    4. Top each slice of eggplant with a spoonful of jarred Marinara sauce. (Image 4)

    Assemble pasta by layering marinara sauce, then spaghetti, then eggplant, and top each eggplant with more marinara sauce.

    5. Top each slice of eggplant with burrata cheese and about a tablespoon of grated parmesan. (Image 5)

    Repeat steps 4-6 one more time with another layer of eggplant slices. Then add Marinara sauce followed by burrata and parmesan cheese. (Image 6)

    7. Add the remaining eggplant, cut them in half if you need to, and place them in sections over the spaghetti where there is room. (Image 7)

    8. Top the eggplant pieces with Marinara sauce and both cheeses as follows. Place the dish in the oven and bake for 30 minutes at 350 degrees - uncovered. (Image 8)

    Top each eggplant with parmesan and burrata cheese, repeat process one more time so we have 2 layers of eggplant.

    9. Once done, this is what you should have. (Image 9)

    10. Top with julienned basil leaves. Serve immediately because this dish is best eaten hot. (Image 10)

    Bake eggplant parmesan pasta and top with julienned basil leaves.

    Expert Tips

    ✓ Sliced Eggplant - Slice the eggplant no more than a quarter inch thick. Any thicker, and it'll not bake through properly. Preheat the oven to 400 degrees to bake the eggplant. Make sure to bake the eggplant for 35 minutes - flipping halfway for the best results.

    ✓ Baked Casserole - Preheat the oven to 350 degrees to bake the entire dish. This dish will be baked uncovered for 30 minutes.

    ✓ Pasta - Do not overcook. the spaghetti, but rather, cook until al dente. Keep in mind, that the spaghetti will be baked for 30 minutes in the oven.

    ✓ Marinara Sauce - For the best results, use a good sauce. I love Rao's Marinara Sauce or the Arrabiata version works great too. You can make your own homemade marinara too, but use a good sauce because it makes all the difference.

    ✓ Soggy Eggplant - To avoid soggy eggplant, don't drench the eggplant with Marinara, simply add a spoonful of marinara followed by cheese.

    ✓ Serve HOT - Enjoy this dish immediately because it tastes best hot.

    Serving Suggestions

    → Enjoy this Baked Eggplant Parmesan Pasta hot. Serve immediately once out of the oven.

    → Pair this dish with a glass of red wine such as Chianti.

    → This dish is pretty carb-heavy so serve bread only if you are cooking for a crowd. Garlic Bread is always a great option prepared on a baguette of French or Italian bread.

    → A simple Arugula Salad prepared with a Balsamic dressing is elegant and delicious.


    Recipe FAQs

    What kind of pasta works best with this dish?

    If you don't want to use spaghetti, linguine, rigatoni, or penne would all work great.

    Is this dish gluten-free?

    No. For a gluten-free version, use gluten-free panko crumbs, gluten-free white flour, and gluten-free pasta.

    What cheese can I substitute for burrata?

    Feel free to use mozzarella cheese in place of burrata, however you must use parmesan cheese for this recipe.

    How do I store the eggplant parmesan pasta?

    Storage - Store eggplant parmesan pasta in an airtight container for up to 3 days. Once you're ready to eat, microwave individual portions for 2 minutes. Make sure you separate the eggplant when warming it up for the best results.
    Freeze - Eggplant parmesan pasta freezes well, so you can freeze this dish for up to 1 month.

    Can I make this dish ahead of time?

    Yes. Prepare the eggplant parmesan pasta up to 2 days in advance. Cover with a plastic wrap and place it in the fridge. Once you're ready to bake, remove plastic wrap and bake in the oven for 30 minutes at 350 degrees.


    A large spoon holding baked spaghetti with baked eggplant and cheese.

    More Baked Casserole Recipes

    • Vegetable Lasagna (gluten-free option)
    • Baked Ziti with Spinach (vegetarian, vegan option, gluten-free option)
    • Baked Eggplant Spinach Rollatini (gluten-free)
    • Baked Eggplant Parmesan (GF option, Vegan option, Vegetarian)

    Tried this recipe? If so, please leave a comment & rate this recipe. That would mean so much to me. If you’re on Instagram, please tag me so I can see your creations. I'm happy to share and mention you. Thank you!


    📖 Recipe Card

    Baked Eggplant Parmesan Pasta topped with cheese and julienned basil.
    Print Recipe
    4.89 from 9 votes

    Eggplant Parm Pasta (Baked Casserole)

    Eggplant Parmesan Pasta is a baked casserole made with whole wheat spaghetti and baked (not fried) eggplant parmesan. This dish is a healthier alternative to the real thing, and yes, it still tastes amazing.
    Prep Time30 minutes mins
    Cook Time1 hour hr 20 minutes mins
    Total Time1 hour hr 50 minutes mins
    Course: Main Course
    Cuisine: Italian
    Diet: Vegetarian
    Servings: 8 servings
    Calories: 502kcal
    Author: Nisha

    Ingredients

    For the Baked Eggplant

    • 1 cup all-purpose flour
    • 3 eggs beaten
    • 2 cups panko crumbs
    • 2 teaspoon dry basil
    • 1 teaspoon oregano
    • 1 teaspoon garlic powder
    • ½ teaspoon black pepper
    • 1 teaspoon salt
    • 1 large eggplant sliced into ¼" rings

    For the Spaghetti

    • 12 ounces whole wheat spaghetti cook until al dente
    • 2 tablespoon extra virgin olive oil
    • 1 ½ teaspoon crushed red pepper
    • 1 ½ tablespoon garlic chopped
    • 1 cup white onion chopped
    • 24 ounces Marinara sauce I love Rao's Marinara
    • salt to taste
    • black pepper to taste

    To Assemble Casserole (2 layers of eggplant)

    • ½ cup Marinara Sauce for bottom of the tray
    • add cooked spaghetti tossed in sauce
    • baked eggplant
    • 1 ½ cups Marinara Sauce top over each eggplant
    • 8 ounces burrata cheese
    • 1 cup parmesan cheese freshly grated
    • fresh basil julienned

    Instructions

    Step 1 - Bake the Eggplant

    • Preheat oven to 400 degrees while you prep the eggplant. Add a tablespoon of olive oil to a large baking tray and brush all over.
    • Slice the eggplant into ¼-inch pieces. Dip each eggplant slice in all-purpose flour on both sides. Coat well. Now dip the eggplant slice in eggs on both sides. Coat well. Finally, dip the eggplant slice in the seasoned panko bread crumbs on both sides. Make sure to season the panko crumbs with garlic powder, dry oregano, dry basil, salt, and black pepper. 
    • Place the eggplant pieces on the greased baking tray. Bake for 35 minutes at 400 degrees - flipping halfway.

    Step 2 - Prepare the Sauce & Spaghetti

    • Boil a pot of water for the pasta. Once boiling, season well with salt. Add whole wheat spaghetti to the large pot of salted water. Follow the instructions on the back of the pasta box and cook pasta until al dente. 
    • Heat up a Dutch castiron on medium heat. Once hot, add two tablespoons of olive oil. Once the oil is hot, add crushed red pepper flakes. Cook for 30 seconds. Now add chopped garlic and cook for 45 seconds. Add chopped onion and season with salt. Saute for 2-3 minutes until the onions are golden-brown. 
    • Next add 24 ounces of Marinara sauce. Season with black pepper. You really don't need salt since the sauce has enough. Cover and simmer the sauce for about 5 minutes. Once heated through, add the spaghetti to the sauce and toss until well coated. 

    Step 3 - Assemble Eggplant Parm Pasta Bake

    • Add ½ cup of Marinara sauce to the bottom of the baking dish. Transfer all the spaghetti to the baking dish.
    • Place 6 crispy eggplant slices (or more if your baking dish is wider) over the spaghetti. Top each slice of eggplant with a spoonful of jarred Marinara sauce. Top each slice of eggplant with burrata cheese and about a tablespoon of grated parmesan. Repeat these steps one more time with another layer of eggplant slices. Then add Marinara sauce followed by burrata and parmesan cheese.
    • Add the remaining eggplant, cut them in half if you need to, and place them in sections over the spaghetti where there is room. Top the eggplant pieces with Marinara sauce and both cheeses as follows. Place the dish in the oven and bake for 30 minutes at 350 degrees - uncovered. Once done, top with julienned basil leaves. Serve immediately and enjoy hot!

    Notes

    • Sliced Eggplant - Slice the eggplant no more than a quarter inch thick. Any thicker, and it'll not bake through properly. Preheat the oven to 400 degrees to bake the eggplant. Make sure to bake the eggplant for 35 minutes - flipping halfway for the best results.
    • Baked Casserole - Preheat the oven to 350 degrees to bake the entire dish. This dish will be baked uncovered for 30 minutes.
    • Pasta - Do not overcook. the spaghetti, but rather, cook until al dente. Keep in mind, that the spaghetti will be baked for 30 minutes in the oven.
    • Marinara Sauce - For the best results, use a good sauce. I love Rao's Marinara Sauce or the Arrabiata version works great too. You can make your own homemade marinara too, but use a good sauce because it makes all the difference.
    • Soggy Eggplant - To avoid soggy eggplant, don't drench the grilled eggplant with Marinara, simply add a spoonful of marinara followed by cheese.

    Nutrition

    Calories: 502kcal | Carbohydrates: 69g | Protein: 24g | Fat: 18g | Saturated Fat: 7g | Cholesterol: 90mg | Sodium: 1330mg | Potassium: 796mg | Fiber: 6g | Sugar: 9g | Vitamin A: 1150IU | Vitamin C: 13mg | Calcium: 399mg | Iron: 5mg
    Vegan Guacamole in a bowl with tortilla chips.

    September 15, 2023 Appetizers

    Vegan Guacamole (Best Guac Recipe)

    Vegan Guacamole is the perfect healthy appetizer for Cinco de Mayo, Game Day, or any party! This is the best guac recipe in just 10 minutes and it's a hit at every party. My version is flavored with garlic and scallions.

    Vegan Guacamole in a bowl surrounded with lime, scallions, red onions, and tomatoes.

    ★★★★★
    "Best guac ever, so flavourful! Can’t make it any other way now! Thanks so much for sharing your recipe Nisha 🙂."
    - Mili


    When eating Mexican cuisine, I need to have guacamole. I first learned to make guacamole while dining at Dos Caminos in New York City. It's one of those trendy Mexican restaurants that offer tableside guac, and since then, I've always made my own guac.

    If you have a ripe avocado lying around, the best way to use it is to make guacamole. This easy guacamole recipe is made with simple ingredients.

    More Appetizer Recipes

    If you love my traditional guacamole, give my Spicy Chipotle Guacamole a try - so good! For some more party appetizers, try my 5 Layer Mexican Dip, Enchilada Bean Dip, and Jalapeno Popper Garlic Bread. For a simple and easy salsa, give this 20-minute Chipotle Salsa a try.


    [feast_advanced_jump_to]

    Why You Will Love This Recipe

    • Quick, Easy & Simple Recipe 
    • Loaded with Healthy Fats
    • Ideal for Cinco de Mayo, Game Day, or a Party!
    • Perfect with Chips and Margaritas
    • Gluten-free & Vegan Recipe
    • Way better than store-bought guacamole

    Ingredients

    To make this delicious vegan guacamole recipe, you need all plant-based ingredients: 

    Ingredients for Vegan Guacamole.
    • Avocado - Make sure your avocado is perfectly ripe when making guacamole. It shouldn't feel hard to touch or too soft, instead, you should be able to gently squeeze the avocado.
    • Scallions - Scallions or green onions are optional in this recipe, however I love the addition of scallions.
    • Garlic - Some love adding chopped garlic, while others don't. It's personal. I love a touch of garlic in my guac.
    • Red Onion - Chopped red, white, or yellow onions work.
    • Tomato - You'll need chopped tomatoes, and I highly recommend using Roma tomatoes - they're the best!
    • Serrano Peppers - I love spicy guacamole, so I love adding serrano peppers with seeds. If you prefer less spice, use jalapenos with or without seeds.
    • Cilantro - You'll need lots of fresh cilantro.
    • Lime - You'll need ¾ to a whole lime depending on how juicy your lime is.
    • Salt - I love sea salt or Himalayan salt when making guac.

    *See the recipe card below for full information on ingredients and quantities.*


    How to Choose the Perfect Avocado?

    When buying avocados, keep in mind when you want to use them. Personally, I love Hass Avocados, they are the best avocados.

    If I'm making guacamole the same day, I would choose an already ripe avocado. However, if I'm making guacamole 2-3 days later, I will choose an avocado that is not yet ripe.

    Unripe Avocados - An unripe avocado will be green and hard to touch. Leave it at room temperature for a few days to ripe. If you want unripe avocados for a longer period, place the avocados in the refrigerator.

    Ripe Avocados - A ripe avocado is brown and you'll be able to gently squeeze it and it won't be mushy.

    Overripe Avocados - An overripe avocado is very brown and overly soft to the touch. This avocado will most likely be brown on the inside as well.


    Substitutions & Variations

    • Corn - You can add fresh or frozen corn (rinsed under warm water) to your guacamole. It's delicious.
    • Scallions - You can skip the scallions - it's not a must-have ingredient in guacamole.
    • Serrano Peppers - If you prefer less spicy guacamole, use jalapeno peppers instead. I use both interchangeably.
    • Garlic - Garlic is optional in this recipe. I love garlicky guacamole but feel free to skip it.
    • Lime - If you don't have fresh lime juice, lemon juice works.

    How to Make The Best Vegan Guacamole Recipe

    1. Add a ripe avocado to a bowl and season well with salt. (Image 1)

    2. Add a squeeze of lime juice. (Image 2)

    Avocado in a bowl with salt and lime juice.

    3. Using a fork or potato masher, mash the avocado and add chopped garlic. (Image 3)

    4. Add chopped red onions. (Image 4)

    Add garlic and red onions to mashed avocado.

    5. Now add fresh cilantro. (Image 5)

    6. Add scallions and chopped serrano peppers. (Image 6)

    Add fresh cilantro, scallions, and jalapeno peppers.

    7. Add some fresh chopped tomatoes. (Image 7)

    8. Mix. Adjust the salt to taste. Enjoy your homemade guacamole with lots of flavor. (Image 8)

    Add tomatoes and mix vegan guacamole.

    Expert Tips

    ✓ Avocado - Make sure your avocado is perfectly ripe, so you should be able to gently squeeze it.

    ✓ Fresh Ingredients - I can't stress this enough, in order to make the best guacamole, you need to use fresh ingredients. 

    ✓ Chunky Guacamole - Don't mash or overmix the guacamole ingredients at the end. 

    Serving Suggestions

    → Guacamole is best with tortilla chips.

    → It tastes great in burritos and also works as a side to enchiladas and tacos.

    → Of course, don't forget the margaritas with your chips.


    How to Store Leftover Guacamole?

    To prevent oxidation, try these tips:

    • Put your guacamole in an airtight container and smooth the surface of the guacamole. Place a plastic wrap directly on top of the guacamole and gently press down to prevent any air bubbles. Seal the container and refrigerate.
    • Additionally, leaving the avocado pit in the guacamole helps prevent oxidation.

    Recipe FAQs

    Does guacamole have garlic?

    Adding garlic to guacamole is a personal choice. After visiting Mexico, I loved the addition of garlic in guacamole. You can take it one step further and roast the garlic too.

    Is guacamole good for you?

    Avocado is loaded with good fats which can help lower bad cholesterol. With that said, guacamole is a calorically dense food and should be eaten in moderation.

    What can I eat guacamole with instead of chips?

    Carrots, celery, cucumbers, crackers, and bread. You can also enjoy guacamole with tacos, fajitas, and enchiladas.


    Chunky Guacamole in a bowl with 2 chips surrounded by scallions, red onions, and tomatoes.

    More Mexican Party Appetizers

    • 5 layer Mexican Dip (easy, creamy, spicy)
    • Chipotle Salsa (healthy, vegan, gluten-free)
    • Enchilada Bean Dip (vegetarian, gluten-free)
    • Jalapeno Popper Garlic Bread (vegetarian)

    Tried this recipe? If so, please leave a comment & rate this recipe. That would mean so much to me. If you’re on Instagram, please tag me so I can see your creations. I'm happy to share and mention you. Thank you!


    📖 Recipe Card

    Vegan Guacamole in a bowl with tortilla chips.
    Print Recipe
    5 from 6 votes

    Vegan Guacamole (Best Guac Recipe)

    Vegan Guacamole is the perfect healthy appetizer for Cinco de Mayo, Game Day, or any party! This is the best guac recipe in just 10 minutes and it's a hit at every party. My version is flavored with garlic and scallions.
    Prep Time10 minutes mins
    Total Time10 minutes mins
    Course: Appetizer
    Cuisine: Mexican
    Diet: Gluten Free, Vegan
    Servings: 3 servings
    Calories: 128kcal
    Author: Nisha

    Ingredients

    • 1 large avocado
    • salt to taste
    • ½ - ¾ of a lime freshly squeezed
    • 1 clove garlic chopped
    • ⅓ cup red onions chopped
    • ½ cup cilantro chopped
    • 2 tablespoon scallions chopped
    • 1-2 tablespoon serrano peppers with seeds (jalapeno peppers work too) chopped
    • ¼ cup tomatoes chopped

    Instructions

    • Add a ripe avocado to a bowl and season well with salt.
    • Add a squeeze of lime juice.
    • Using a fork or potato masher, mash the avocado and mix well.
    • To the mashed avocado, add a clove of garlic.
    • Add chopped red onions.
    • Followed by fresh cilantro.
    • Add scallions.
    • Now add chopped serrano peppers.
    • Add some fresh chopped tomatoes.
    • Mix. Adjust the salt to taste. Enjoy your homemade guacamole with lots of flavor.

    Notes

    This recipe was first published on February 6, 2013, and has since been updated.
     
    • Avocado - Make sure your avocado is perfectly ripe, so you should be able to gently squeeze it.
    • Fresh Ingredients - I can't stress this enough, in order to make the best guacamole, you need to use fresh ingredients. 
    • Chunky Guacamole - Don't mash or overmix the guacamole ingredients at the end. 

    Nutrition

    Calories: 128kcal | Carbohydrates: 11g | Protein: 2g | Fat: 10g | Saturated Fat: 1g | Sodium: 9mg | Potassium: 451mg | Fiber: 6g | Sugar: 2g | Vitamin A: 538IU | Vitamin C: 28mg | Calcium: 27mg | Iron: 1mg
    Spoon of potato and cauliflower garnished with cilantro.

    September 7, 2023 Dairy-Free

    Punjabi Aloo Gobi Recipe (Potato and Cauliflower Curry)

    Punjabi Aloo Gobi Recipe is a widely popular potato and cauliflower curry cooked in an Indian masala consisting of ginger, garlic, green chilies, onions, and tomatoes. This one-pot meal is vegan, authentic, prepared homestyle (no frying), and makes a quick & easy weeknight meal.

    Spoon of potato and cauliflower garnished with cilantro.

    ★★★★★
    "I got to say, every time I think of making a vegetarian dish- I automatically come over to your blog- these are the only dishes my husband enjoys. Thanks a lot for the step-by-step instructions, they are really helpful and all your dishes are OFF THE HOOK!!!!...keep blogging away and keep sharing your sinfully delicious dishes.....!!!"
    - Anonymous


    Growing up in a Punjabi household, I ate Aloo Gobi very often. It was a staple in our home alongside other Punjabi dishes such as Bhindi Masala, Aloo Matar, Bhindi Fry, and Palak Paneer.

    This sabji is one of those easy weeknight dishes that's made with simple ingredients. My mom served this sabzi with roti, Toor Dal, and yogurt. A complete Punjabi meal, if you ask me.


    [feast_advanced_jump_to]

    What is Aloo Gobi?

    Aloo is potato in Hindi and gobi is cauliflower. Hence, this dish is a potato and cauliflower curry cooked in a masala paste.

    Punjabi Aloo Gobi Recipe is a widely popular Northern Indian dish served in most Indian households and restaurants. This simple, yet delicious dish goes best with roti (Indian bread) and yogurt.

    To make this dish, first prepare the masala paste with ginger, garlic, green chilies, onions, and tomatoes, along with Indian spices. Cook down this masala until you have a paste-like consistency.

    Then add the potatoes and cauliflower florets, cover, and cook on low flame until fork tender. Garnish with cilantro. There is no deep frying in this recipe which is typical at most Indian restaurants.

    A serving dish containing aloo gobi garnished with cilantro.

    Why You Will Love This Recipe

    • Homestyle Punjabi Aloo Gobi (no frying involved)
    • Classic Vegetarian Indian Dish
    • Comforting Dish with Warm Spices
    • Quick & Simple Meal
    • Makes an Easy Weeknight Dinner
    • Vegan & Gluten-free

    Ingredients

    Ingredients of Aloo Gobi.
    • Cauliflower - Cut the cauliflower into medium to larger-sized florets. Don't cut the florets too small else you'll end up with mushy Aloo Gobi.
    • Potatoes - I recommend using Russet potatoes for this dish. Cut the potatoes into 1-inch cubes to prevent them from getting mushy as well.
    • Ginger & Garlic - Simply chop fresh ginger and garlic cloves. You'll need lots of it.
    • Green Chilies - No need to chop the chilies, just slit them in half. Use less for less heat, or more.
    • Onions - Finely chop the red onions. Feel free to use a yellow onion if you prefer.
    • Tomatoes - Chop fresh tomatoes. I love using Roma tomatoes - I find them to be extra juicy.
    • Spices - You'll need basic Indian spices for this recipe such as turmeric powder, coriander powder, and Kashmiri red chili powder (this adds color, but no heat - you can use paprika instead). Additionally, you'll need garam masala and whole cumin seeds.
    • Cilantro - Chop fresh cilantro or coriander leaves which adds so much brightness and flavor to this dish.
    • Oil - For Indian food, use a high-heat oil such as avocado oil.

    *See the recipe card below for full information on ingredients and quantities.*


    How to Make The Best Aloo Gobi Recipe

    1. Heat up a large pan on medium heat and once hot, add 2 tablespoons oil. (Image 1)

    2. Once the oil heats, up, add cumin seeds. Saute for 30 seconds. (Image 2)

    3. Now add chopped ginger and garlic, followed by slit green chilies. Saute for about 45 seconds. (Image 3)

    4. Add the red onions and season with a little salt. Cook the onions until translucent - this will take about 2-3 minutes. (Image 4)

    Cook Aloo Gobi by sauteeing cumin, ginger, garlic, green chilies, and onion in oil.

    5. Once the onions are translucent, this is what you should have. (Image 5)

    6. Add tomatoes and season with a little salt. (Image 6)

    7. Stir the onions and tomato mixture. (Image 7)

    8. Add your ground spices - turmeric powder, coriander powder, and Kashmiri chili powder (or paprika). Cook for 30 seconds. (Image 8)

    Make the masala by adding onions, tomatoes, and Indian spices.

    9. Now add 2 tablespoons of water - this will prevent the spices from burning. (Image 9)

    10. Stir well. (Image 10)

    11. Cover and cook the masala on low heat for 3-5 minutes until you have a paste-like consistency. (Image 11)

    12. Your masala paste is ready. (Image 12)

    Cover and cook the onion-tomato masala mixture until water is absorbed.

    13. Add the cubed potatoes. (Image 13)

    14. Followed by cauliflower florets. Season with salt. (Image 14)

    15. Stir well and make sure every potato and floret is coated with the masala mixture. (Image 15)

    16. Cover and cook on low heat for 12-14 minutes until the potatoes and cauliflower are fork tender. (Image 16)

    Add potatoes and cauliflower florets, then stir, cover and cook.

    17. If you need to deglaze the pan, add 2 tablespoons of water. (Image 17)

    18. Add garam masala. (Image 18)

    19. Add lots of fresh cilantro and turn off the stove. (Image 19)

    20. Gently stir preventing the potato and cauliflower from breaking. Wait 15 minutes before serving - this allows the flavors to marry together. (Image 20)

    Aloo gobi is fork tender and ready to eat so garnish with garam masala and cilantro.

    Expert Tips

    ✓ Potato & Cauliflower - Cut the potatoes into 1-inch cubes. Cut the cauliflower florets into larger pieces to avoid mushy Aloo Gobi.

    ✓ Prevent Mushy Cauliflower - Cover and cook the potatoes and cauliflower on low heat for just 12-14 minutes max. The steam will cook down the sabzi. Do not overcook Aloo Gobi else it will fall apart and become mushy.

    ✓ Wait to Serve - Wait 15 minutes before serving Aloo Gobi. Allow the flavors to marry together.

    ✓ Prevent Sticking - If there is sticking on the pan, deglaze the pan with 2-3 tablespoons of water as needed.

    Serving Suggestions

    → You can serve Aloo Gobi as a main dish or side dish.

    → The best way to serve cauliflower potato curry is with roti, naan, or paratha.

    → A side of yellow dal such as a simple Toor Dal is wonderful. Feel free to serve with Jeera Rice.

    → To help cool off the spice, enjoy with plain yogurt or raita. This completes the meal.


    Recipe FAQs

    Is Aloo Gobi vegan?

    Yes! Aloo Gobi is vegan!

    Is Aloo Gobi gluten-free?

    Yes. Aloo Gobi is gluten-free.

    How do I store leftover aloo gobi?

    Store Aloo Gobi in an airtight container and microwave it when you're ready to eat. Aloo Gobi stays fresh in the fridge for up to 3 days.

    What does Aloo Gobi mean in English?

    Aloo means potato and gobi means cauliflower. This is a potato and cauliflower curry cooked in an Indian masala.

    What part of India does Aloo Gobi originate from?

    Aloo Gobi is a North Indian dish, specifically from the region of Punjab. This recipe is made Punjabi style.

    A horizontal photo of aloo gobi in a serving dish with cilantro on top.

    More Punjabi Recipes

    • Easy Matar Paneer Recipe (Punjabi-style)
    • Punjabi Chole (vegan, healthy, gluten-free)
    • Palak Paneer
    • Dal Makhani (no cream, gluten-free)

    Tried this recipe? If so, please leave a comment & rate this recipe. That would mean so much to me. If you’re on Instagram, please tag me so I can see your creations. I'm happy to share and mention you. Thank you!


    📖 Recipe Card

    Spoon of potato and cauliflower garnished with cilantro.
    Print Recipe
    5 from 7 votes

    Punjabi Aloo Gobi Recipe (Potato & Cauliflower Curry)

    Punjabi Aloo Gobi Recipe is a widely popular potato and cauliflower curry cooked in an Indian masala. This dish is vegan, authentic, prepared homestyle (no frying), and makes a quick & easy weeknight meal. A simple one-pot meal.
    Prep Time20 minutes mins
    30 minutes mins
    Total Time50 minutes mins
    Course: Main Course
    Cuisine: Indian, Punjabi
    Diet: Gluten Free, Vegan, Vegetarian
    Servings: 4 servings
    Calories: 193kcal
    Author: Nisha

    Ingredients

    • 2 tablespoon oil
    • 1 teaspoon cumin seeds
    • 4 cloves garlic chopped
    • 1 ½ inch piece ginger chopped
    • 2 green chilies slit
    • 1 cup red onions chopped
    • 1 cup tomatoes chopped
    • ½ teaspoon turmeric powder
    • 1 ½ teaspoon coriander powder
    • ¾ teaspoon Kashmiri red chili powder
    • salt to taste
    • 2 tablespoon water - to avoid spices burn
    • 330 grams potatoes 1-inch cubes
    • 400 grams cauliflower cut into large florets
    • 2 tablespoon water to deglaze if needed
    • ¼ teaspoon garam masala
    • ⅓ cup cilantro chopped

    Instructions

    • Heat up a large pan on medium heat and once hot, add 2 tablespoons oil.
    • Once the oil heats, up, add cumin seeds. Saute for 30 seconds.
    • Now add chopped ginger and garlic, followed by slit green chilies. Saute for about 45 seconds.
    • Add the red onions and season with a little salt. Cook the onions until translucent - this will take about 2-3 minutes.
    • Once the onions are translucent, this is what you should have.
    • Add tomatoes and season with a little salt.
    • Stir the onions and tomato mixture.
    • Add your ground spices - turmeric powder, coriander powder, and Kashmiri chili powder (or paprika). Cook for 30 seconds.
    • Now add 2 tablespoons of water - this will prevent the spices from burning.
    • Stir well.
    • Cover and cook the masala on low heat for 3-5 minutes until you have a paste-like consistency.
    • Your masala paste is ready.
    • Add the cubed potatoes.
    • Followed by cauliflower florets. Season with salt.
    • Stir well and make sure every potato and floret is coated with the masala mixture.
    • Cover and cook on low heat for 12-14 minutes until the potatoes and cauliflower are fork tender.
    • If you need to deglaze the pan, add 2 tablespoons of water.
    • Add garam masala.
    • Add lots of fresh cilantro and turn off the stove.
    • Gently stir preventing the potato and cauliflower from breaking. Wait 15 minutes before serving - this allows the flavors to marry together.

    Notes

    This recipe was first posted on November 3, 2009, and has been updated since.
    • Potato & Cauliflower - Cut the potatoes into 1-inch cubes. Cut the cauliflower florets into larger pieces to avoid mushy Aloo Gobi.
    • Prevent Mushy Cauliflower - Cover and cook the potatoes and cauliflower on low heat for just 12-14 minutes max. The steam will cook down the sabzi. Do not overcook Aloo Gobi else it will fall apart and become mushy.
    • Wait to Serve - Wait 15 minutes before serving Aloo Gobi. Allow the flavors to marry together.
    • Prevent Sticking - If there is sticking on the pan, deglaze the pan with 2-3 tablespoons of water as needed.

    Nutrition

    Calories: 193kcal | Carbohydrates: 29g | Protein: 5g | Fat: 8g | Saturated Fat: 1g | Sodium: 122mg | Potassium: 855mg | Fiber: 6g | Sugar: 6g | Vitamin A: 521IU | Vitamin C: 77mg | Calcium: 63mg | Iron: 2mg
    Bean and cheese tostadas topped with an avocado cream sauce.

    September 1, 2023 Dal

    Bean and Cheese Tostadas (baked, easy)

    Bean and Cheese Tostadas are topped with refried beans, spinach, pico de gallo, cheddar cheese, vegan avocado cream sauce, and taco sauce. These vegetarian tostadas are baked and make a quick and easy weeknight meal.

    Bean and cheese tostadas topped with an avocado cream sauce.

    ★★★★★
    "Must try recipe!! It was delicious!! Thank you Nisha for sharing it!!."
    - Neha Wani


    My husband is obsessed with tostadas... Mexican food in general. OBSESSED! He literally asks me to make him tostadas every single week and will even pick up the baked tostada shells from the grocery store on a weekly basis. 

    Elevate your weeknights with these easy, mouthwatering, and fully-loaded vegetarian tostadas. These tostadas are great for taco night and make a quick dinner. 

    More Delicious Tostada Recipes

    Check out my very popular Taco Bell Spicy Tostada! If you like chicken or turkey, then give my Chicken Tostadas or Spicy Baked Turkey Tostadas a try - both recipes are made with ground meat. Lastly, if you love Indian Fusion, then give these vegetarian Baked Aloo Chaat Tostadas a chance because they taste like a healthier Papdi Chaat.


    [feast_advanced_jump_to]

    What is a Tostada?

    A tostada is a flat tortilla that is either baked or fried. It is usually made with corn and is essentially a flat taco.

    Tostadas are pretty versatile, in other words, you can top them with any kind of protein. I personally love a vegetarian option when it comes to tostadas.

    Once you add your protein, in this case, beans, I like adding veggies to my tostadas - lettuce or spinach for a healthier alternative, and pico de gallo. Then I like to top my tostada with some cheese and bake it off in the toaster oven.

    Drizzle some avocado cream sauce and taco sauce and indulge. They're so good!

    Bean and Cheese tostada  topped with avocado cream sauce and a bite taken.

    Ingredients

    For the Beans:

    Canned Refried Beans (canned): I love Trader Joe's Organic Refried Pinto Beans Salsa Style. Feel free to use refried black beans as well, but I prefer mine with pinto beans. Feel free to make homemade beans if you prefer.

    Onion: Preferably red onion, chopped.

    Taco Sauce: I love Taco Bell's Hot Sauce, also love Pico Pica Taco Sauce.

    Taco Seasoning: I love Trader Joe's Taco Seasoning and it's a bit spicy. They're all the same so any seasoning will work.

    Avocado Oil: Any flavorless oil works.

    For Pico de Gallo:

    Basics: Tomatoes, Red Onion, Jalapeno, Cilantro, Fresh Lime Juice,  and Salt.

    For Avocado Cream Sauce:

    Basics: Ripe Avocado, Olive Oil, Water, Garlic, Cilantro, Cumin Powder, Salt, and Jalapeno Pepper (for more spice you can use a Serrano Pepper).

    For Bean Tostadas: 

    Baked Tostada: I love Guerrero's Baked Tostadas.

    Fresh Spinach: Baby spinach that's chopped.

    Cheddar Cheese: You'll need shredded cheese. I love using sharp cheddar in this recipe.

    Taco Sauce: I love Taco Bell's hot sauce, but Pico Pica works amazing and tastes just like Taco Bell.


    Why You Will Love Recipe

    • Quick & Easy Weeknight Meal
    • Vegetarian Bean Tostadas
    • Mouthwatering & Delicious
    • BAKED
    • Versatile
    • Gluten-free

    How to make Bean and Cheese Tostadas recipe?

    Step 1 - Make the Refried Beans

    1. Heat up a pan on medium heat, once hot, add oil, followed by red onion. Add just a pinch of salt. Saute for 3 minutes. 

    2. Add refried pinto beans - I like Trader Joe's Organic Refried Pinto Beans Salsa Style. 

    3. Add taco sauce. 

    4. Now add taco seasoning and a little water. Mix well. 

    Saute onions and add canned refried beans.

    5. Cook for a minute. Your beans are ready. Set aside. 

    Refried Beans ready.

    Step 2 - Make the Pico de Gallo

    1. Add the tomatoes, red onions, and jalapenos to a mixing bowl.

    2. Now add fresh cilantro, juice of lime, and salt. Mix well. Set aside.

    Prepare pico de gallo with cilantro onions tomatoes in a bowl.

    Step 3 - Make the Vegan Avocado Cream Sauce

    1. Add all the ingredients of the avocado cream sauce to a mini food processor and blend.

    2. This is what you should have. Taste it and adjust salt, lime juice, and spice as needed.

    Add avocado cream sauce ingredients to a food processor and blend.

    Step 4 - Assemble

    1. Add warm refried beans all over a baked tostada (you may use fried as well).

    2. Top with chopped spinach.

    3. Top with pico de gallo.

    4. Now top with cheddar cheese.

    Spread beans on tostada, add spinach, pico de gallo, and cheese.

    5. Bake in a toaster oven at 400 degrees for 3-4 minutes or until cheese is melted. Keep a close eye to make sure the tostada doesn't burn.

    6. Drizzle avocado cream sauce on top and Taco Bell Hot Sauce (or any other taco sauce you like). Enjoy your crispy bean tostadas.

    Bake tostada and add avocado cream sauce.

    Expert Tips

    ✓ Make Ahead Option - The refried beans, pico de gallo, and avocado cream sauce can all be made ahead of time.

    ✓ Grate your sharp cheddar cheese and chop the fresh spinach.

    ✓ Bake in the toaster oven until the cheese has melted, but stay close because these tostadas bake fast.


    Recipe FAQs

    1. Can I make these bean tostadas vegan?

    Yes. Simply replace cheese with a non-dairy cheese that melts well.

    2. Can I make this recipe gluten-free?

    This recipe is already gluten-free since corn tostada shells are gluten-free.

    3. What other vegetables can I add to these tostadas?

    Tostadas are a great way to use up leftover veggies. You can add sauteed zucchini, eggplant, or broccoli. Essentially, any veggie you have on hand, add it.

    4. Where can I find baked tostadas?

    So here in Southern California, I am able to find Guerrero's Baked Tostadas at Smart & Final, Ralph's, and Albertson's. I have found the fried version at Target, however not the baked one.

    If you're living on the East Coast, I would try looking for Guerrero's Baked Tostadas at your local grocery store - Shoprite, Acme, Wegman's, etc.

    5. How can I make crispy tostada shells at home?

    If you can't find store-bought baked tostadas, simply use a corn tortilla and brush both sides with oil. Bake it in the toaster oven at 400 degrees for 8-10 minutes, flipping halfway.
    Alternatively, you may use flour tortillas and do the exact same thing, they will crisp up beautifully. Note: If you use flour tortillas, this recipe is no longer gluten-free.

    6. What kinds of cheese can I use for this recipe?

    For this recipe, I used sharp cheddar, however you may use Mild/Medium Cheddar Cheese, Mexican Cheese Blend, Pepper Jack Cheese, or any cheese that melts well.

    7. What other toppings can I use over these tostadas?

    Other options for toppings - shredded lettuce, sour cream,  cotija cheese, and queso fresco would all be great.

    Vegetarian Tostadas with a side of avocado cream sauce and pico de gallo.

    More Tostada Recipes!

    • Taco Bell Spicy Tostada (baked)
    • Baked Aloo Chaat Tostadas (healthy, gluten-free, vegan option)
    • Spicy Baked Turkey Tostadas (gluten-free)
    • Instant Pot Chipotle Chicken Tinga Tostadas

    📖 Recipe Card

    Bean and cheese tostadas topped with an avocado cream sauce.
    Print Recipe
    5 from 3 votes

    Bean and Cheese Tostadas

    Bean Tostada is a baked flat taco that's topped with refried beans, spinach, pico de gallo, cheddar cheese, avocado cream sauce, and taco sauce. It's the perfect quick weeknight meal.
    Prep Time30 minutes mins
    Cook Time12 minutes mins
    Total Time42 minutes mins
    Course: Main Course
    Cuisine: Mexican
    Diet: Gluten Free, Vegetarian
    Servings: 12 tostadas
    Calories: 190kcal
    Author: Nisha

    Equipment

    • Food Processor 4-Cup
    • Mixing Bowls

    Ingredients

    for pico de gallo

    • 2 cups tomatoes chopped
    • ¾ cup red onion chopped
    • 1 jalapeno with seeds
    • ½ cup fresh cilantro chopped
    • Juice of 1 lime
    • ⅓ teaspoon salt

    for beans

    • ½ tablespoon avocado oil
    • ½ cup red onions chopped
    • pinch of salt
    • 15 ounce can organic refried pinto beans I like Trader Joe's
    • ¼ cup taco sauce I like Taco Bell's Hot Sauce
    • ½ cup water
    • 2 teaspoon taco seasoning I liked Trader Joe's

    for avocado sauce

    • 1 avocado
    • 1 tablespoon olive oil
    • 6 tablespoon water
    • 2 cloves garlic
    • ½ cup cilantro
    • ½ teaspoon cumin powder
    • ½ teaspoon salt
    • 1 jalapeno with seeds
    • Juice of ½ to 1 lime

    other condiments

    • 4 cups spinach chopped
    • 1 ½ cups cheddar cheese shredded

    to assemble each tostada, you'll need

    • 1 baked tostadas makes 12 tostadas total
    • ⅓ cup spinach chopped
    • 2 spoonfuls of pico de gallo
    • 2-3 tablespoon cheddar cheese shredded, add more if needed
    • bake in the toaster oven for 3-4 minutes at 400 degrees
    • drizzle of avocado cream sauce
    • drizzle of Taco Bell hot sauce

    Instructions

    Step 1 - Make the Refried Beans

    • Heat up a pan on medium heat, once hot, add oil, followed by red onion. Add just a pinch of salt. Saute for 3 minutes.
    • Add refried pinto beans - I like Trader Joe's Organic Refried Pinto Beans Salsa Style.
    • Add taco sauce.
    • Now add taco seasoning and a little water. Mix well.
    • Cook for a minute. Your beans are ready. Set aside.

    Step 2 - Make the Pico de Gallo

    • Add the tomatoes, red onions, and jalapenos to a mixing bowl.
    • Now add fresh cilantro, juice of lime, and salt. Mix well. Set aside.

    Step 3 - Make the Vegan Avocado Cream Sauce

    • Add all the ingredients of the avocado cream sauce to a mini food processor and blend.
    • This is what you should have. Taste it and adjust salt, lime juice, and spice as needed.

    Step 4 - Assemble

    • Add warm refried beans all over a baked tostada (you may use fried as well).
    • Top with chopped spinach.
    • Top with pico de gallo.
    • Now top with cheddar cheese.
    • Bake in a toaster oven at 400 degrees for 3-4 minutes or until cheese is melted. Keep a close eye to make sure the tostada doesn't burn.
    • Drizzle avocado cream sauce on top and Taco Bell Hot Sauce (or any other taco sauce you like). Enjoy your crispy bean tostadas.

    Video

    Notes

    • Vegan option - use a non-dairy cheese.
    • Make Ahead Option - The refried beans, pico de gallo, and avocado cream sauce can all be made ahead of time.
    • Grate your sharp cheddar cheese and chop the fresh spinach.
    • Bake in the toaster oven until the cheese has melted, but stay close because these tostadas bake fast.

    Nutrition

    Calories: 190kcal | Carbohydrates: 19g | Protein: 7g | Fat: 10g | Saturated Fat: 4g | Cholesterol: 15mg | Sodium: 603mg | Potassium: 309mg | Fiber: 5g | Sugar: 3g | Vitamin A: 1562IU | Vitamin C: 13mg | Calcium: 146mg | Iron: 1mg
    Aloo Shimla Mirch Featured Image.

    August 22, 2023 Dairy-Free

    Aloo Shimla Mirch (Aloo Capsicum Sabzi)

    Aloo Shimla Mirch ki Sabzi is a simple and delicious Indian dish made with potatoes and bell peppers. There is very minimal chopping in this recipe making it the perfect weeknight meal. This dish is loved for its simplicity and rich flavors. Serve with roti or plain paratha.

    Aloo Shimla Mirch Image.

    ★★★★★
    "We made this last night and it turned out really good. The pictures made it very easy to follow the recipe."
    - Leena


    Growing up in a joint family, my mom often made quick and easy recipes that would feed a family of 8. I complained so much when my mom would make such recipes which I referred to as boring recipes. So essentially, anything with bell peppers, carrots, and green peas, you get the idea.

    I just wanted to eat paneer dishes, chole, and rajma - basically, recipes that had a ton of flavor and required a little more work lol.

    Now that I have my own family, I realize how hard it is to cook every single day. I've grown to love and appreciate recipes such as Aloo Shimla Mirch. This quick recipe is made with simple ingredients. Hope you love it too!

    More Punjabi Recipes

    Aloo Gobi (Punjabi homestyle), Punjabi Chole, Rajma Masala, and Dal Makhani (no cream).


    [feast_advanced_jump_to]

    What is Aloo Shimla Mirch?

    Aloo translates to potatoes and shimla mirch means bell peppers, hence this dish is a potato and bell pepper fry. Aloo Shimla Mirch ki Sabji is also known as Aloo Capsicum Dry Sabzi or Aloo Shimla Mirch Sabzi.

    This simple Punjabi dish requires very minimal work. There is no fine chopping involved. Simply cube the onions, potatoes, and bell peppers, and saute the veggies in aromatic spices.

    Once covered with a lid, the steam cooks down the veggies in this recipe resulting in melt-in-your-mouth aloo shimla mirch. Enjoy with roti or dal rice.


    Why You Will Love Recipe

    • Simple Easy Recipe
    • Quick Weeknight Dinner
    • An Indian Stir Fry
    • Minimal Chopping
    • Delicious & Flavorful
    • Vegan

    Ingredients

    Aloo Shimla Mirch Ingredients.
    • Potatoes - Russet raw potatoes work best for this dish. Make sure you cube the potatoes into 1-inch cubes.
    • Bell Peppers - Most people use green peppers or green capsicum for this dish, however I used both red & green bell peppers. Red capsicum, yellow capsicum, or orange capsicum will all work. Feel free to change it up and cut the peppers into 1-inch cubes.
    • Onions - Chop red onions into 1-inch cubes, or you may use white onions too.
    • Cumin Seeds - This will be sauteed at the beginning of the recipe.
    • Basic Spices - Turmeric Powder, Coriander Powder, Red Chili Powder (cayenne), Salt, and Dry Mango Powder (Amchur).
    • Water - You'll need a little water to deglaze the bottom of the pan and to help cook down the potatoes.
    • Avocado Oil - Any tasteless oil will work for this recipe, I just prefer avocado oil.

    How to Make Aloo Shimla Mirch Recipe

    1. Heat up a pan on medium heat, once hot, add oil. Once the oil is hot, add cumin seeds. Saute for about 30 seconds.

    2. Add the red onions and season with a little salt. Saute for about 2 minutes until the onions are translucent.

    3. Now add the cubed potatoes and season with a little salt. Stir and cook the potatoes for about 4 minutes.

    4. Now cover with a lid and cook on low flame for 5 minutes. The steam will cook down the potatoes.

    Saute Onions Potatoes Steps 1-4.

    5. This is what you should have.

    6. Now add the bell peppers and season with a little salt.

    7. Stir for a minute.

    8. Now season with basic Indian spices - coriander powder, turmeric powder, and red chili powder.

    Add Bell Peppers Spices Steps 5-8.

    9. Stir well.

    10. Add a quarter cup of water.

    11. Stir. Cover and cook the shimla mirch sabzi on low heat for about 10 minutes. Check-in between to prevent the dish from burning.

    12. Check your sabzi. The potatoes should be fork-tender. If there is anything sticking to the pan, add a couple of tablespoons of water and stir.

    Cook Aloo Shimla Mirch Steps 9-12.

    13. Garnish with mango powder (amchur).

    14. Your dish is ready! Enjoy with roti or plain paratha.

    Add Amchur Steps 13-14.

    Expert Tips

    ✓ Cube the onions, potatoes, and bell peppers into 1-inch cubes. Do not chop or dice.

    ✓ Season each main ingredient with a little salt. It's generally advised to add salt as you go rather than adding a bunch of salt toward the end of the dish.

    ✓ Cook the potatoes and bell peppers on low heat to prevent the dish from sticking to the bottom.

    ✓ If at any point you have food sticking to the pan, simply add a couple of tablespoons of water and use a wooden spoon to scrape it off.

    Serving Suggestions

    → Aloo Shimla Mirch ki Sabji is best when served with Indian bread such as roti or plain paratha.

    → Make it a complete meal with a simple dal that enhances flavor of this dish - I recommend Andhra Style Tomato Dal and Instant Pot Toor Dal. Both dals are made with yellow pigeon peas or toor dal.

    → A side of raita or yogurt is perfect when paired with a dry sabzi.


    Storage

    • Aloo Shimla Mirch can be stored in an airtight container for up to 3-4 days.
    • Once you're ready to eat, microwave the sabzi for 1-2 minutes.

    Frequently Asked Questions

    1. Is this recipe vegan?

    Yes. Aloo Capsicum ki Sabzi is vegan.

    2. Is this recipe gluten-free?

    Yes. This Aloo Capsicum recipe is naturally gluten-free.

    Aloo Capsicum Dry Sabzi.

    More Indian Sabzis

    • Capsicum Kura (Andhra Bell Pepper Curry)
    • Paneer Bhurji (vegetarian, gluten-free)
    • Bhindi Fry | Okra sauteed with onions and spices
    • Kadai Paneer (vegetarian, gluten-free)

    Tried this recipe? If so, please leave a comment & rate this recipe. That would mean so much to me. If you’re on Instagram, please tag me so I can see your creations. I'm happy to share and mention you. Thank you!


    📖 Recipe Card

    Aloo Shimla Mirch Featured Image.
    Print Recipe
    5 from 3 votes

    Aloo Shimla Mirch

    Aloo Shimla Mirch ki Sabzi is a simple and delicious Indian dish made with potatoes and bell peppers. There is very minimal chopping in this recipe. Serve with roti or plain paratha.
    Prep Time5 minutes mins
    Cook Time30 minutes mins
    Total Time35 minutes mins
    Course: Main Course
    Cuisine: Indian
    Servings: 4 servings
    Calories: 153kcal
    Author: Nisha

    Ingredients

    • 2 tablespoon oil
    • 1 teaspoon cumin seeds
    • 1 large red onion cut into 1-inch cubes
    • 1 large potato cut into 1-inch cubes
    • 1 large green bell pepper cut into 1-inch cubes
    • 1 large red bell pepper cut into 1-inch cubes
    • salt to taste
    • ½ teaspoon red chili powder
    • 2 teaspoon coriander powder
    • ½ teaspoon turmeric powder
    • ¼ cup water little more if needed
    • ½ teaspoon mango powder amchur

    Instructions

    • Heat up a pan on medium heat, once hot, add oil. Once the oil is hot, add cumin seeds. Saute for about 30 seconds.
    • Add the red onions and season with a little salt. Saute for about 2 minutes until the onions are translucent.
    • Now add the cubed potatoes and season with a little salt. Stir and cook the potatoes for about 4 minutes.
    • Now cover with a lid and cook on low flame for 5 minutes. The steam will cook down the potatoes.
    • This is what you should have.
    • Now add the bell peppers and season with a little salt.
    • Stir for a minute.
    • Now season with basic Indian spices - coriander powder, turmeric powder, red chili powder, and Kashmiri red chili powder.
    • Stir well.
    • Add a quarter cup of water.
    • Stir. Cover and cook the shimla mirch sabzi on low heat for about 10 minutes. Check-in between to prevent the dish from burning.
    • Check your sabzi. The potatoes should be fork-tender. If there is anything sticking to the pan, add a couple of tablespoons of water and stir.
    • Garnish with mango powder (amchur).
    • Your dish is ready! Enjoy with roti or plain paratha.

    Notes

    This recipe was first published in 2010 and has since been updated.
    • Cube the onions, potatoes, and bell peppers into 1-inch cubes. Do not chop or dice.
    • Season each main ingredient with a little salt. It's generally advised to add salt as you go rather than adding a bunch of salt toward the end of the dish.
    • Cook the potatoes and bell peppers on low heat to prevent the dish from sticking to the bottom.
    • If at any point you have food sticking to the pan, simply add a couple of tablespoons of water and use a wooden spoon to scrape it off.

    Nutrition

    Calories: 153kcal | Carbohydrates: 20g | Protein: 3g | Fat: 8g | Saturated Fat: 1g | Sodium: 14mg | Potassium: 504mg | Fiber: 4g | Sugar: 4g | Vitamin A: 1124IU | Vitamin C: 79mg | Calcium: 34mg | Iron: 2mg
    Blueberry Muffins Featured Image

    August 17, 2023 American

    Fluffy and Easy Blueberry Muffins (super moist)

    Fluffy and Easy Blueberry Muffins are super easy to make and are bursting with flavor. These moist blueberry muffins go perfectly with a hot cup of coffee. Enjoy them for a weekend brunch or anytime you want a sweet treat.

    Fluffy Blueberry Muffins

    ★★★★★
    "This was only posted a few hours ago and I couldn’t resist how good they looked. 38 weeks pregnant and I didn’t realize I was craving them until you posted this recipe, Nisha. They really hit the spot 🤤 they’re so soft, moist, and yummy! And very easy to make!! Thank you for sharing this recipe 🥰."
    - Mahaa


    Lately, I've been craving desserts, and I want the real thing. When baking slightly indulgent treats, I like giving away 75% of my goodies so I'm not sitting there stuffing my face with muffins.

    For my dessert recipes, I like toning down the sugar amount because I just don't like painfully sweet desserts. I find the desserts at most American bakeries so sweet, that I just prefer making my own.


    [feast_advanced_jump_to]

    Fluffy & Easy Blueberry Muffins

    Blueberry Muffins are my favorite type of muffin, there is just no question. These fluffy muffins are ideal for breakfast, brunch, or tea time. They're the perfect balance of sweet and slightly tart.

    The best part is you can make them any time of year, not just during blueberry season. During the fall and winter months, simply use frozen blueberries instead of fresh ones and the recipe still works great.

    Hope you guys enjoy these tender crumb blueberry muffins.

    Easy Blueberry Muffins

    Why You'll Love These Muffins

    • Soft & Fluffy
    • Perfect Blueberry Muffins
    • Not Terribly Sweet
    • Easy Blueberry Muffin Recipe
    • They can be made all year - using Frozen Blueberries
    • Perfect for Breakfast/Brunch/Afternoon Tea
    • Just 10 Ingredients
    • Gluten-free Option (use gf flour - see Notes below)

    Ingredients

    • All-Purpose White Flour: Definitely need white flour to make muffins. Alternatively, you may use whole wheat flour or gluten-free white flour. You'll also need a tablespoon of flour to dust the blueberries - this will prevent the blueberries from sinking to the bottom.
    • Baking Powder: Leavening agent needed for baked goods.
    • Salt: Salt helps bring out the flavor of the dessert.
    • Butter: You'll need melted butter, make sure to use unsalted butter.
    • Sugar: White/Cane sugar for some sweetness. You'll also need a little sugar to sprinkle the top of the muffins prior to baking - this creates a golden muffin top.
    • Egg: You'll need one large egg for this recipe. Make sure the egg is at room temperature.
    • Vanilla Extract: Vanilla extract adds flavor and a little sweetness to the muffins.
    • Milk: Adds moisture to these muffins. Make sure the milk is at room temperature.
    • Yogurt: Results in tender muffins. Make sure the yogurt is at room temperature.
    • Blueberries: I recommend using fresh blueberries that have been washed and dried. Alternatively, you may use frozen blueberries - start with 1 cup and see if you want to add more since the frozen berries will bleed.

    How to make Blueberry Muffins recipe step by step?

    1. Preheat oven to 425 degrees. Combine the dry ingredients in a medium bowl - flour, baking powder, and salt. (Image 1)

    2. On low-medium heat, melt butter in a small pot. Do not let the butter brown. If you do - that's ok - it'll just have a slightly nutty flavor which is delicious too. (Image 2)

    Sift Flour Melt Butter Steps 1-2

    3. In a large mixing bowl, combine sugar and butter. (Image 3)

    4. Use an electric mixer and cream the butter and sugar until creamy... takes about 2-3 minutes. (Image 4)

    5. Add the wet ingredients - milk, yogurt, vanilla extract, and egg. (Image 5)

    6. Blend for a couple of minutes until all the ingredients are well combined. (Image 6)

    Cream Sugar, Butter, Eggs Steps 3-6

    7. Add the flour mixture to the wet ingredients. (Image 7)

    8. Mix until well incorporated, however do NOT over-mix. (Image 8)

    9. This is how your batter should look. (Image 9)

    10. Take fresh blueberries that have been rinsed and dried. Add a tablespoon of flour and mix. This prevents the blueberries from sinking to the bottom of the muffin. (Image 10)

    11. Add the floured blueberries to the batter and fold them in (do NOT mix, FOLD). (Image 11)

    12. The muffin batter is ready. (Image 12)

    Add Flour Blueberries Steps 7-12

    13.  Grease the cupcake/muffin pan with coconut oil, or use muffin liners. Using an ice-cream scoop, scoop the batter into a cupcake or muffin pan. (Image 13)

    14. Into the oven at 425 degrees for 10 minutes. (Image 14)

    15. After 10 minutes, lower the oven temperature to 375 degrees and bake the muffins for another 10 minutes at 375. (Image 15)

    16. Perfectly golden brown and delicious muffins are ready! (Image 16)

    Transfer Batter Bake Steps 13-16

    Expert Tips for the Best Muffins

    ✓ Use fresh juicy blueberries over frozen ones.

    ✓ Cream the butter and sugar really well until it's nice and creamy.

    ✓ Once you add the dry ingredients, DO NOT OVERMIX.

    ✓ Dust a tablespoon of flour over the blueberries - this prevents the berries from sinking to the bottom. Fold the berries into the batter. Again, do not overmix.

    ✓ Sprinkle a touch of sugar over each muffin before baking which helps create a golden muffin top.


    Serving Suggestions

    → Enjoy blueberry muffins with a cup of hot coffee.

    → Spread some butter on top over warm blueberry muffins - the butter slowly melts and it's sooooo good.

    → Muffins are a great side addition to brunch. Serve eggs or something savory along with these muffins.


    Substitutions

    • Healthier Muffins - instead of all-purpose white flour you may use white whole wheat flour, whole wheat flour, or whole wheat pastry flour.
    • Gluten-free - use white gluten-free flour for the best results.
    • Dairy-free - use non-dairy butter, milk, and yogurt. For non-dairy milk, unsweetened soy milk, almond milk, or cashew milk all work.
    • Eggless - for an egg substitute, use a chia egg which is 1 tablespoon of chia seeds soaked in 3 tablespoons of water. I haven't tested this out, but this is a popular substitute for eggs and should work.
    • Vegan Blueberry Muffins - use non-dairy butter, milk, and yogurt along with an egg substitute. Just note - this will drastically change the flavor of the muffins.
    • Yogurt - For more moist muffins, you may substitute sour cream. I recommend using full-fat sour cream.
    • Fresh Blueberries - you may use frozen blueberries instead of fresh ones.
    • Other Fruits - instead of blueberries, you may substitute strawberries for Strawberry Muffins or raspberries for Raspberry Muffins.

    Storage

    • Store the muffins in an airtight container for two days max. Since this recipe contains fruit, you'll need to consume them within two days. You may also store them in the refrigerator for 4-5 days and just warm them up when you want one.
    • To warm up the muffins, place them in a toaster oven - you can choose to bake them or toast them. I prefer crispy muffins, so I like mine toasted. Once the muffin is warmed up, I like mine with a little butter on top.

    Frequently Asked Questions

    1. Can I use frozen blueberries instead of fresh ones?

    Yes, absolutely! The frozen blueberries will bleed more so I would start with 1 cup of frozen blueberries, fold them into the batter, and see if you need to add another ½ cup.

    2. Can I make these muffins with whole-wheat flour?

    Yes, you may, however this will certainly affect the taste and texture of these muffins. I've attempted making Blueberry Muffins with whole-wheat flour a few times - while they're still good, they definitely taste healthy.

    3. Can I make these muffins gluten-free?

    Yes! Replace all-purpose white flour with white gluten-free flour. I love the brand Cup 4 Cup.

    4. Can I make these Blueberry Muffins dairy-free?

    Yes! Simply replace the butter with vegan butter and milk with unsweetened dairy-free milk. Note, that this will affect the taste and texture slightly, but if you're vegan, I'm sure you already know the best vegan butter and dairy-free milk brands to use.

    5. How do I make Lemon Blueberry Muffins?

    Yes! Lemon and blueberry complement one another perfectly. To the batter go ahead and add one tablespoon of lemon zest and one tablespoon of lemon juice. It's wonderful!


    More Breakfast Recipes

    • Blueberry Coconut Pancakes
      Blueberry Coconut Pancakes (10 ingredients or less)
    • Peanut Butter Banana Oats Featured Image
      Peanut Butter Banana Overnight Oats (healthy, creamy)
    • Classic Banana Walnut Steel Cut Oats
      Pressure Cooker Steel Cut Oats
    • Whole Wheat Banana Walnut Muffins (healthyish, refined sugar free)

    📖 Recipe Card

    Blueberry Muffins Featured Image
    Print Recipe
    4.84 from 6 votes

    Fluffy and Easy Blueberry Muffins (super moist)

    Fluffy and Easy Blueberry Muffins are super easy to make and are bursting with flavor. These moist blueberry muffins go perfectly with a hot cup of coffee. Enjoy them for a weekend brunch or anytime you want a sweet treat.
    Prep Time15 minutes mins
    Cook Time20 minutes mins
    Total Time35 minutes mins
    Course: Dessert
    Cuisine: American
    Servings: 8 muffins
    Calories: 217kcal
    Author: Nisha

    Equipment

    • Muffin Cupcake Pan
    • Electric Mixer
    • Ice-Cream Scoop
    • Vanilla Extract
    • Mixing Bowls

    Ingredients

    Dry Ingredients

    • 1 ½ cups all-purpose flour
    • 2 teaspoon baking powder
    • ½ teaspoon salt

    Wet Ingredients

    • 6 tablespoon unsalted butter melted
    • ½ cup + 2 tbsp sugar
    • 1 egg
    • 1 teaspoon vanilla extract
    • ¼ cup whole milk
    • ¼ cup ogurt
    • 1 ½ cups blueberries rinsed & dried
    • 1 tablespoon all-purpose flour sprinkle over blueberries

    Garnish

    • 1 teaspoon sugar sprinkle all over muffins - you only need 1 teaspoon total

    Instructions

    • Preheat oven to 425 degrees. Combine the dry ingredients in a medium bowl - flour, baking powder, and salt.
    • On low-medium heat, melt butter in a small pot. Do not let the butter brown. If you do - that's ok - it'll just have a slightly nutty flavor which is delicious too.
    • In a large mixing bowl, combine sugar and butter.
    • Use an electric mixer and cream the butter and sugar until creamy... takes about 2-3 minutes.
    • Add the wet ingredients - milk, yogurt, vanilla extract, and egg.
    • Blend for a couple of minutes until all the ingredients are well-combined.
    • Add the flour mixture to the wet ingredients.
    • Mix until well incorporated, however do NOT over-mix.
    • This is how your batter should look.
    • Take fresh blueberries that have been rinsed and dried. Add a tablespoon of flour and mix. This prevents the blueberries from sinking to the bottom of the muffin.
    • Add the floured blueberries to the batter and fold them in (do NOT mix, FOLD).
    • The muffin batter is ready.
    • Grease the cupcake/muffin pan with coconut oil, or use muffin liners. Using an ice-cream scoop, scoop the batter into a cupcake or muffin pan.
    • Into the oven at 425 degrees for 10 minutes.
    • After 10 minutes, lower the oven temperature to 375 degrees and bake the muffins for another 10 minutes at 375.
    • Perfectly golden brown and delicious muffins are ready!

    Notes

    This recipe was first posted on August 31, 2020, and has since been updated.
    • Use fresh juicy blueberries over frozen ones.
    • Cream the butter and sugar really well until it's nice and creamy.
    • Once you add the dry ingredients, DO NOT OVERMIX.
    • Dust a tablespoon of flour over the blueberries - this prevents the berries from sinking to the bottom. Fold the berries into the batter. Again, do not overmix.
    • Sprinkle a touch of sugar over each muffin before baking which helps create a golden muffin top.
    • Gluten-free - use white gluten-free flour for the best results.
      Eggless - for an egg substitute, use a chia egg which is 1 tablespoon of chia seeds soaked in 3 tablespoons of water. I haven't tested this out, but this is a popular substitute for eggs and should work.

    Nutrition

    Calories: 217kcal | Carbohydrates: 33g | Protein: 4g | Fat: 8g | Saturated Fat: 5g | Cholesterol: 36mg | Sodium: 231mg | Potassium: 74mg | Fiber: 1g | Sugar: 17g | Vitamin A: 268IU | Vitamin C: 2mg | Calcium: 88mg | Iron: 1mg
    Vegetable Pulao featured image

    August 10, 2023 Dairy-Free

    Vegetable Pulao Instant Pot (vegan)

    Vegetable Pulao Instant Pot is prepared with basmati rice and aromatic Indian spices. This dish is flavorful, simple, and delicious. Unlike other examples of this recipe, mine requires minimal chopping which lowers prep time!

    Pot of rice with chickpeas and vegetables with pickles and yogurt in the background.

    ★★★★★
    "This was a super quick and delicious recipe. Something I was able to make for my family on a weeknight without too much prep. As suggested, some Raita and pickle were a perfect match with this pulav."
    - Priya


    Pulao was always a staple in our home. On nights my mom didn't feel like cooking - which may have been more often than not lol - she made pulao in the pressure cooker.

    Nowadays, we have the convenience of the Instant Pot. There's no waiting around for the whistle to go off and keeping track of how many whistles went by. Sigh! I could never keep up.

    More Instant Pot Recipes

    My Instant Pot Jeera Rice (Cumin Rice) goes with everything and is super easy to make. Looking for some Indian comfort food, make this Green Moong Dal Khichdi or Plain Khichdi Recipe. Love lentils? Try this Instant Pot Toor Dal or Andhra Style Tomato Pappu (Dal).


    [feast_advanced_jump_to]

    What is Vegetable Pulao?

    Vegetable Pulao or Vegetable Pulav is a popular Indian dish made with fragrant basmati rice and flavored with whole spices along with various mixed vegetables such as carrots, green peas, corn, and green beans.  In the Western world, pulao would be referred to as Vegetable Rice Pilaf.

    There are many variations of veg pulao. Pulao can be flavored with ginger, garlic, green chilies, and tomatoes, however for my version I've used none of these ingredients saving you a lot of time.

    Note: There are no ginger, garlic, or tomatoes in this Instant Pot Pulao recipe so it's minimal chopping making it an easy weeknight meal.

    Today I'm sharing my mom's Punjabi-style easy vegetable pulao recipe. This veg pulao recipe consists of onions, veggies, chickpeas, and simple whole spices. 

    A spoon holding a small serving of vegetable rice.

    Why You'll Love This Recipe

    • Quick & Easy
    • Weeknight Meal
    • An Instant Pot Recipe
    • Simple Comfort Food
    • Aromatic & Delicious
    • Vegan & Gluten-free

    Ingredients

    • Basmati Rice - Make sure to use white basmati rice.
    • Onions - You'll need 1 large onion. Red or white onions work, just make sure they're sliced, but not too thinly.
    • Canned Chickpeas - I always stick with organic canned chickpeas, rinsed & drained. Feel free to use dry chickpeas, but make sure to soak them before using.
    • Frozen Mixed Vegetables - For this combo, I used carrots and peas, but feel free to use green beans, corn, edamame, or whatever combo of frozen mixed vegetables.
    • Whole Spices - Cinnamon, cloves, bay leaves, black cardamom (moti elachi), green cardamom (elachi), cumin seeds, and peppercorns.
    • Powdered Spices - Coriander powder, cumin powder, red chili powder, garam masala, and salt.
    • Water - The rice-to-water ratio after soaking is 1 ½ cups of rice to 1 ¾ cups of water.

    *See the recipe card for full information on ingredients and quantities.*


    Substitutions

    • Chickpeas - Replace with cauliflower a potatoes, or soy nuggets (nutrela). It's important to use the same quantity of the ingredients you're replacing to avoid inconsistent measurements.
    • Masala Pulao - Instead of all the powdered spices used, you can add 1-2 tablespoons of pav bhaji masala. This tastes AMAZING! Feel free to use chicken biryani or vegetable biryani masala too.
    • Veggies - Frozen vegetables work well in this recipe - corn, beans, carrots, and green peas. You may also add veggies such as baby corn and edamame. Furthermore, you can add fresh veggies such as green bell peppers.
    • Oil - Instead of oil you can use ghee. Note: This recipe is no longer vegan if you use ghee.

    How to make Vegetable Pulao Instant Pot recipe?

    1. Wash rice until the water runs clear. Then soak rice in water for 15 minutes. (Image 1)

    2. Rinse and drain rice. Set aside. (Image 2)

    a two-photo collage showing steps 1 and 2 to drain rice.

    3. Heat up an Instant Pot in SAUTE mode. Once hot, add avocado oil or any flavorless oil. Add all the whole spices. Saute for about 45 seconds. (Image 3)

    4. Add sliced onions and season with salt. (Image 4)

    5. Saute for 3-4 minutes until slightly golden. (Image 5)

    6. This is what you should have. (Image 6)

    Saute whole spices and sliced onions - steps 3-6.

    7. Add the washed & drained rice. (Image 7)

    8. Saute the rice for 2 minutes and click CANCEL on the Instant Pot. (Image 8)

    9. Add the canned chickpeas and frozen mixed vegetables. Make sure you wash and rinse the frozen mixed vegetables under warm water and drain. Also, make sure to rinse and drain the chickpeas. (Image 9)

    10. Add water and all the powdered spices - salt, red chili powder, coriander powder, cumin powder, and garam masala. (Image 10)

    Add rice and frozen vegetables - steps 7-10.

    11. Mix well and scrape the bottom well to make sure nothing is sticking to the bottom. (Image 11)

    12. Cover the Instant Pot and set the Vent Valve to Seal. Click HIGH PRESSURE for 5 minutes. Once 5 minutes is up, let the Instant Pot pressure release on its own for 10 minutes and then manually release. You'll have the best results using this method. (Image 12)

    13. This is what you should have. Fluff the rice with a fork and you'll have fluffy rice. To avoid mushy rice, do NOT mix the rice. (Image 13)

    14. Serve perfectly cooked Vegetable Pualo with achaar and raita (or plain yogurt). (Image 14)
    Optional: Garnish with coriander leaves or mint leaves.

    Cook rice in Instant Pot, then fluff with a fork - steps 11-14.

    Expert Tips

    ✓ Onions - Slice the onions, but not too thin.

    ✓ Wash Rice - Wash the rice well until the water runs clear. Then soak for 15 minutes. Rinse and drain.

    ✓ Water - Add the exact amount of water mentioned for this recipe - 1 ¾ cups of water.

    ✓ For the BEST Results - Allow the pressure to naturally release for 10 minutes and then do a quick pressure release


    Serving Suggestions

    → Serve Veg Pulao with a side or raita. My personal favorite is raita with onions and tomatoes flavored with chat masala, roasted cumin powder, red chili powder, and salt.

    → Sides of your favorite achaar and papad are wonderful too.


    Recipe FAQs

    Can I use Brown Rice instead of White Rice?

    As much as I love cooking with brown rice instead of white rice, I need to work on the consistency of this pulao with brown rice. Once it's been tested, I will share my version of brown rice vegetable pulao.

    Can I add nuts to this recipe?

    Sure. Simply heat ghee and saute cashew nuts. Saute for a couple of minutes and add the nuts to the rice.

    What rice is best for pulao?

    I recommend long-grained fragrant basmati rice that is aged. I love Tilda Basmati Rice which you can easily find at your local Indian grocery store or Amazon.

    What's the difference between biryani and pulao?

    There are quite a few differences between biryani and pulao. Biryani uses a dum-style cooking method whereas pulao is a one-pot dish. Biryani uses more complex spices, on the other hand, pulao uses more simple basic spices. takes a lot longer to cook and it's also much more flavorful than pulao. Additionally, biryani is layered rice between vegetables or meat, whereas pulao is all cooked in one pot where the flavors are distributed equally.

    Personally, I love making biryani for special occasions and pulao is perfect for everyday cooking.

    Close-up shot of Vegetable Pulao with peas and chickpeas in a large serving bowl.

    More Rice Recipes

    • Instant Pot Brussels Sprouts Pulao (vegan, gluten-free)
    • Instant Pot Jeera Rice Cumin Rice
      Instant Pot Jeera Rice (Cumin Rice)
    • Thai Basil Fried Rice (vegetarian, dairy-free, GF option)
    • Tawa Pulao (vegetarian, gluten-free)

    Tried this recipe? If so, please leave a comment & rate this recipe. That would mean so much to me. If you’re on Instagram, please tag me so I can see your creations. I'm happy to share and mention you. Thank you!


    📖 Recipe Card

    Print Recipe
    5 from 7 votes

    Vegetable Pulao Instant Pot

    Vegetable Pulao Instant Pot is prepared with basmati rice and aromatic Indian spices. This dish is flavorful, simple, and delicious.
    Prep Time10 minutes mins
    Cook Time30 minutes mins
    Total Time40 minutes mins
    Course: Main Course, Sides
    Cuisine: Indian
    Servings: 5 servings
    Calories: 380kcal
    Author: Nisha

    Equipment

    • Instant Pot

    Ingredients

    for the Whole Spices

    • 2 bay leaves
    • 2 black cardamoms moti elachi
    • 3 green cardamoms
    • 3 cloves
    • ¼ teaspoon peppercorns
    • 2 inch cinnamon stick
    • 1 ½ teaspoon cumin seeds

    for the Rice & Veggies

    • 1 ½ tablespoon avocado oil
    • 1 large red onion sliced
    • 1 15 ounce can organic chickpeas drained & rinsed
    • 1 ½ cups organic frozen mixed vegetables carrots, peas, corn, and green beans; rinse under warm water
    • 1 ½ cups basmati rice soaked, washed & rinsed
    • 1 tsp salt
    • 2 teaspoon coriander powder
    • 1 teaspoon cumin powder
    • 1 teaspoon red chili powder
    • 1 teaspoon garam masala
    • 1 ¾ water

    Instructions

    • Wash rice until the water runs clear. Then soak rice in water for 15 minutes.
    • Rinse and drain rice. Set aside.
    • Heat up an Instant Pot in SAUTE mode. Once hot, add avocado oil or any flavorless oil. Add all the whole spices. Saute for about 45 seconds.
    • Add sliced onions and season with salt.
    • Saute for 3-4 minutes until slightly golden.
    • This is what you should have.
    • Add the washed & drained rice.
    • Saute the rice for 2 minutes and click CANCEL on the Instant Pot.
    • Add the canned chickpeas and frozen mixed vegetables. Make sure you wash and rinse the frozen mixed vegetables under warm water and drain. Also, make sure to rinse and drain the chickpeas.
    • Add water and all the powdered spices - salt, red chili powder, coriander powder, cumin powder, and garam masala.
    • Mix well and scrape the bottom well to make sure nothing is sticking to the bottom.
    • Cover the Instant Pot and set the Vent Valve to Seal. Click HIGH PRESSURE for 5 minutes. Once 5 minutes is up, let the Instant Pot pressure release on its own for 10 minutes and then manually release. You'll have the best results using this method.
    • This is what you should have. Fluff the rice with a fork and you'll have fluffy rice. To avoid mushy rice, do NOT mix the rice.
    • Serve perfectly cooked Vegetable Pualo with achaar and raita (or plain yogurt). Optional: Garnish with coriander leaves or mint leaves.

    Notes

    This recipe was first published on October 5, 2022, and has been updated since.
    • Slice the onions, but not too thin.
    • Wash the rice well until the water runs clear. Then soak for 15 minutes. Rinse and drain.
    • Add the exact amount of water mentioned for this recipe - 1 ¾ cups of water.
    • For the BEST Results - Allow the pressure to naturally release for 10 minutes and then do a quick pressure release

    Nutrition

    Calories: 380kcal | Carbohydrates: 74g | Protein: 9g | Fat: 6g | Saturated Fat: 1g | Sodium: 977mg | Potassium: 309mg | Fiber: 6g | Sugar: 1g | Vitamin A: 3788IU | Vitamin C: 10mg | Calcium: 63mg | Iron: 2mg

    Vegan Hummus Sandwich

    August 7, 2023 Dairy-Free

    Vegan Hummus Sandwich

    Vegan Hummus Sandwich with Sun-Dried Tomatoes is scrumptious and the ultimate vegan sandwich! This healthy vegan sandwich is made with Indian cilantro chutney, Mediterranean hummus, and Italian sun-dried tomatoes.

    Vegan Hummus Sandwich with tomatoes, avocado, sun-dried tomatoes, spinach, cucumbers on whole grain bread.

    I'm obsessed with sundried tomatoes because it takes any dish to the next level be it pasta, chicken, rice, or even a simple sandwich like this one.

    I wanted to come up with a vegan summer sandwich recipe that's easy to put together. I started recipe testing with hummus and chutney, and then threw in sun-dried tomatoes, and a bunch of veggies until I felt, okay, this is it!

    More Easy Sandwich Recipes

    Check out my very popular Bombay Grilled Sandwich flavored with potato, veggies, and chat masala. Skip the potatoes, and make this delicious Veg Grilled Cheese Sandwich. For an easy no-cook meal, try this Paneer Sandwich with veggies. For a traditional Italian sandwich, try this grilled Pesto Caprese Panini. Looking for some tea time inspo? Try these dainty Indian-inspired Afternoon Tea Party Sandwiches.


    [feast_advanced_jump_to]

    What is a Vegan Hummus Sandwich with Sun-Dried Tomatoes?

    Hummus Sandwich is an easy lunch made on whole-grain bread and is completely vegan. Trust me, you don't need white or sourdough bread because this sandwich is the ultimate sandwich and packed with flavor.

    I combined the flavors from India, Italy, and the Mediterranean all into one mouthwatering sandwich using cilantro chutney, sun-dried tomatoes, and hummus respectively.

    TIP: Make sure to use sun-dried tomatoes in olive oil. You can easily find sun-dried tomatoes in oil at Whole Foods or Trader Joe's.

    To begin with toast two slices of bread. Spread hummus on one side and mashed avocado on the other side of the bread. Then add veggies such as baby spinach, onions, tomatoes, jalapenos for spice, and sun-dried tomatoes. Additionally, we will flavor the sandwich with cilantro chutney.


    Why You Will Love This Recipe

    • Scrumptious Vegan Sandwich
    • It's the ULTIMATE Vegan Sandwich
    • Loaded with Flavor
    • Fresh & Delicious
    • Healthy & Good For You
    • Gluten-free option (see Notes below)

    Ingredients

    Ingredients for Hummus Sandwich.
    • Whole-Grain Bread: I love Dave's Killer Bread 21 Whole Grain - it's the best bread - so good and healthy. You can get a 2-pack at Costco for $8, else check out Whole Foods.
    • Avocado: Mash the avocado and season with garlic powder, salt, black pepper, lemon juice, and chopped green chilies.
    • Lemon Juice: You'll need freshly squeezed lemon juice for the avocado. Lime juice also works.
    • Green Chilies: You'll need green chilies for the mashed avocado. You may also use serrano peppers.
    • Spices: Garlic Powder, Salt, and black pepper.
    • Fresh Veggies: Fresh Baby Spinach, Cucumbers, Tomatoes (or cherry tomatoes), Red Onions, and Jalapenos.
    • Sun-Dried Tomatoes: You need to use good quality sun-dried tomatoes that are made in olive oil. Both Trader Joe's and Whole Foods sell versions made in olive oil, or check another grocery store.
    • Hummus: Store-bought hummus works great. I use Costco's brand which is organic creamy hummus. Of course, you can always use homemade hummus.
    • Cilantro Chutney: Here is my recipe for cilantro chutney which is super easy to make and so delicious.

    *See the recipe card below for full information on ingredients and quantities.*


    Substitutions

    • Leafy Greens - You may substitute chopped kale or arugula for spinach.
    • Cilantro Chutney - Feel free to use Mint Chutney or Red Garlic Chutney.
    • Regular Hummus - You may use Garlic Hummus or Sun-Dried Tomato Hummus.
    • Don't Like A Veggie - skip it, however, this will alter the flavor of the sandwich.

    How to Make Vegan Hummus Sandwich with Sun-Dried Tomatoes?

    Step 1 - Prep

    1. Slice cucumbers, tomatoes, red onions, and jalapenos. (Image 1)

    2. Set aside fresh baby spinach. I just use store-bought. (Image 2)

    3. Prepare your chutney in advance. I love my Cilantro Chutney recipe. (Image 3)

    4. Set aside hummus - store-bought works great. I love Costco's small organic hummus packets. (Image 4)

    Gather ingredients sliced onions, sliced tomatoes, sliced cucumbers, jalapenos, baby spinach, cilantro chutney, hummus, steps 1-4.

    5. Mash an avocado and season with chopped green chilies, salt, black pepper, garlic powder, and freshly squeezed lemon juice. Mix well. (Image 5)

    Add avocado to a bowl and season with salt, black pepper, garlic powder, and green chilies - step 5.

    Step 2 - Assemble Sandwich

    1. Take 2 slices of toasted whole wheat bread. (Image 1)

    2. Spread a generous amount of hummus on one slice of bread. (Image 2)

    3. Spread the seasoned mashed avocado on the other side. (Image 3)

    4. Place baby spinach leaves over the hummus. (Image 4)

    Assemble sandwich spread hummus on one slice of toasted bread and avocado on the other and add spinach - steps 1-4.

    5. Top with sliced tomatoes, salt, and black pepper. (Image 5)

    6. Top with sliced red onion. (Image 6)

    7. Now top with sliced jalapenos. (Image 7)

    8. And now the best part - add the sun-dried tomatoes (prepared in olive oil). This truly elevates the flavor of the sandwich. (Image 8)

    Add veggies - tomatoes, onions, jalapenos, and sun-dried tomatoes - steps 5-8.

    9. Top with sliced cucumbers. (Image 9)

    TIP: For a slightly sweet flavor, add a drizzle of sweet balsamic vinegar over the cucumbers.

    10. Finally, add a dollop of cilantro chutney over the avocado. This too adds a ton of flavor. (Image 10)

    11. Close the sandwich. (Image 11)

    12. Slice in half and enjoy your avocado and hummus sandwich! It's absolutely incredible! (Image 12)

    Add cucumber, chutney, close sandwich - steps 9-12.

    Expert Tips

    ✓ Thinly slice veggies for the best results.

    ✓ Use sun-dried tomatoes prepared in olive oil.

    ✓ Make sure you season the avocado and add green chilies for spice and flavor.

    ✓ Store-bought hummus works great, but homemade hummus works well too!

    ✓ Prepare the Cilantro Chutney in advance.

    ✓ For a gluten-free option, use gluten-free sliced bread.


    Serving Suggestions

    → A simple arugula salad with balsamic vinaigrette.

    → Any soup, such as this Tomato Basil Soup.

    → Your favorite snack - chips, crackers, or whatever you like.


    Storage

    • Store the veggies in an airtight container so you can make a fresh sandwich when you want to. The veggies should stay fresh in the refrigerator for 3-4 days.
    • Store the cilantro chutney in an airtight container as well to retain freshness. The chutney will stay fresh for 4-5 days, or freeze the chutney.

    Frequently Asked Questions

    Is this recipe vegan?

    Yes. This recipe is completely vegan.

    Is this recipe gluten-free?

    No. For a gluten-free sandwich, use gluten-free sliced bread.

    What other bread can I use besides whole-grain bread?

    You may use whole wheat bread, white bread, or sourdough bread.

    What other veggies can I add to this sandwich?

    Shredded carrots, chopped kale, arugula, or green bell peppers would be great additions.

    Which cheese can I add to this sandwich?

    Once you add dairy cheese the sandwich is no longer vegan. With that said, goat cheese or feta cheese would both taste amazing in this sandwich.

    Angled shot of vegan hummus sandwich with tomatoes, onions, avocado, cucumber, sun-dried tomatoes, hummus, and spinach.

    More Sandwich Recipes

    • BOMBAY GRILLED SANDWICH
      Bombay Grilled Sandwich (vegetarian)
    • Paneer Sandwich
      Paneer Sandwich
    • Avocado Egg Salad Sandwich (healthy)
    • Veg Grilled Cheese Sandwich

    Tried this recipe? If so, please leave a comment & rate this recipe. That would mean so much to me. If you’re on Instagram, please tag me so I can see your creations. I'm happy to share and mention you. Thank you!


    📖 Recipe Card

    Vegan Hummus Sandwich with Chutney image
    Print Recipe
    5 from 1 vote

    Vegan Hummus Sandwich

    Vegan Hummus Sandwich with Sun-Dried Tomatoes is scrumptious and the ultimate vegan sandwich! This healthy mouthwatering sandwich makes an easy and quick lunch!
    Prep Time25 minutes mins
    Total Time25 minutes mins
    Course: Main Course
    Cuisine: Itaian, Mediterranean
    Diet: Vegan
    Servings: 4 sandwiches
    Calories: 502kcal
    Author: Nisha

    Ingredients

    for the mashed avocado

    • 1 large avocado mashed
    • freshly squeezed lemon juice to taste
    • salt to taste
    • black pepper, to taste
    • garlic powder to taste
    • 2 green chilies, chopped

    For the sandwich (makes 4 sandwiches)

    • 8 slices whole-grain bread toasted
    • 140 grams hummus I use the small costco brand
    • 1 avocado mashed & seasoned
    • 2 cups spinach leaves
    • 3 roma tomatoes sliced
    • 1 red onion sliced
    • 1 cucumber sliced
    • 4 tablespoon Cilantro Chutney recipe shared
    • 2 jalapenos sliced
    • ½ cup sun-dried tomatoes in oil chopped
    • salt to taste
    • black pepper to taste

    Instructions

    Step 1 - Prep

    • Slice cucumbers, tomatoes, red onions, and jalapenos.
    • Set aside fresh baby spinach. I just use store-bought.
    • Prepare your chutney in advance. I love my Cilantro Chutney recipe.
    • Set aside hummus - store-bought works great. I love Costco's small organic hummus packets.
    • Mash an avocado and season with chopped green chilies, salt, black pepper, garlic powder, and freshly squeezed lemon juice. Mix well.

    Step 2- Assemble Sandwich

    • Take 2 slices of toasted whole wheat bread.
    • Spread a generous amount of hummus on one slice of bread.
    • Spread the seasoned mashed avocado on the other side.
    • Place baby spinach leaves over the hummus.
    • Top with sliced tomatoes, salt, and black pepper.
    • Top with sliced red onion.
    • Now top with sliced jalapenos.
    • And now the best part - add the sun-dried tomatoes (prepared in olive oil). This truly elevates the flavor of the sandwich.
    • Top with sliced cucumbers.
    • Finally, add a dollop of cilantro chutney over the avocado. This too adds a ton of flavor.
    • Close the sandwich.
    • Slice in half and enjoy your avocado and hummus sandwich! It's absolutely incredible!

    Notes

    • Thinly slice veggies for the best results.
    • Use sun-dried tomatoes prepared in olive oil.
    • Make sure you season the avocado and add green chilies for spice and flavor.
    • Store-bought hummus works great, but homemade hummus works well too!
    • Prepare the Cilantro Chutney in advance.
    • For a gluten-free option, use gluten-free sliced bread.

    Nutrition

    Calories: 502kcal | Carbohydrates: 68g | Protein: 17g | Fat: 23g | Saturated Fat: 3g | Cholesterol: 0mg | Sodium: 533mg | Potassium: 1336mg | Fiber: 22g | Sugar: 14g | Vitamin A: 2258IU | Vitamin C: 47mg | Calcium: 69mg | Iron: 5mg
    Cilantro Chutney featured image

    July 28, 2023 Chutneys

    Cilantro Chutney (vegan)

    Cilantro Chutney is a staple condiment in every Indian household that's made with fresh cilantro, lemon juice, ginger, garlic, green chilies, peanuts, and more.

    Cilantro Chutney image

    Cilantro Chutney is a staple in every Indian household. This is the most popular Indian Green Chutney you'll find throughout India.

    I usually have a batch of some kind of Green Chutney in the fridge or freezer. It comes in so handy when you want to put together a quick meal. Whether you want to enjoy chutney with samosas, sandwiches, kati rolls, or kebabs.

    My favorite way to enjoy Cilantro Chutney is in a Chutney Cheese Grilled Cheese. Am I right?


    [feast_advanced_jump_to]

    What is Cilantro Chutney?

    Cilantro Chutney also known as Coriander Chutney or Indian Green Chutney or Dhaniya Chutney is a popular condiment found in every Indian household. It's so easy to make and loaded with flavor. 

    Simply throw all the ingredients into a blender and blend. That's it. You'll end up with the most beautiful green color and refreshing chutney.

    Serving Suggestions: Cilantro Chutney is such a versatile condiment. Enjoy them on a Bombay Grilled Sandwich, Bhel Puri with Chana, Aloo Tikki Chaat, Paneer Sandwich, and this Spinach Chutney Cheese Toastie. You can also top them over eggs and pasta. The possibilities are endless.

    Coriander Chutney Image

    Why You'll Love This Chutney

    • Quick & Easy
    • Spicy & Delicious
    • Versatile - goes with everything!
    • Vibrant green color stays "green" for days
    • Freezes well - so you always have chutney
    • Vegan & Gluten-free

    Ingredients

    Cilantro Chutney Ingredients

    Fresh Cilantro: You'll need fresh cilantro leaves for this recipe.

    Garlic & Ginger: A clove of garlic and half an inch of fresh ginger is all you need.

    Salt & Sugar: Of course, you need salt or black salt (kala namak) works. Sugar helps retain that bright green color.

    Lemon Juice: Lemon helps brighten all the flavors and also helps keep the chutney bright green. You may also use lime juice if you don't have a lemon on hand.

    Ice Cubes: Believe it or not, the ice cubes stop the oxidation process and keep the chutney bright green for days.

    Cumin Seeds: Adds a nice smoky flavor. If you don't have cumin seeds, ½ teaspoon of ground cumin works too.

    Red Onion: Feel free to use red onion or white/yellow onion.

    Unsalted Peanuts: Make sure you use unsalted peanuts. Do not use salted or roasted peanuts. You can easily find unsalted peanuts at the Indian grocery store.

    Green Chilies: For spicier chutney, add more green chilies. In this recipe, I used 2 green chilies, but you can add more if you'd like. Additionally, you can swap Indian/Thai green chilies for serrano peppers.


    How To Make Cilantro Chutney Recipe - step by step instructions

    1. Add fresh cilantro leaves to a blender. I love The Beast Blender.

    2. Add the remaining ingredients to the blender. Water is optional - add 2 tablespoons of water, if need be.

    Add Chutney Ingredients to Blender

    3. Blend until the chutney has a smooth consistency.

    4. Your chutney is ready.

    Blend Chutney Ingredients

    Expert Tips

    ✓ To make smooth cilantro chutney, invest in a good blender such as The Beast Blender which I highly recommend because it's cute and compact. Other great options are BlendTec or Vitamix. Additionally, I don't recommend using a food processor.

    NOTE: I've used cheaper blenders in the past, such as NutriBullet and Magic Bullet, unfortunately, they just aren't able to grind everything up into a smooth paste.

    ✓ Add 2 tablespoons of water, if need be, to get the blender going. Feel free to add more water for your desired consistency.

    Tips to keep green chutney "bright green" for days!

    • add a touch of sugar
    • add lemon juice
    • and add ice cubes - this prevents oxidation

    Substitutions

    • Peanuts - You can use raw unsalted cashews instead of peanuts.
    • No Nuts - Don't want to use nuts? Skip the nuts and use plain bhujia sev instead. You'll need about 2 tablespoons of sev.
    • Additional Herbs - In addition to fresh coriander leaves, you can add ¼ amount of mint leaves. This turns the chutney into Cilantro Mint Chutney which is delicious.
    • Indian Green Chilies - Feel free to substitute with serrano peppers which are also very spicy.

    Storage

    • Once you've made your chutney, transfer it into an airtight container.
    • Alternatively, you can freeze the chutney into an ice cube tray so you end up with individual portions of chutney. Then just pop them out as needed. The chutney is good for about 2 months in the freezer.
    • To thaw the chutney, place a few cubes in a bowl and transfer it to the fridge the night before or a few hours prior. The chutney will be ready for use after a few hours.

    Ideas On How To Use Indian Green Chutney

    You can enjoy Indian Green Chutney with:

    • Great for Indian snacks such as samosas, pakodas, rava dhokla, patra, and muthiya, so good.
    • Delicious on sandwiches such as Spinach Chutney Cheese Toastie, Cheese Chutney Corn Toastie, Afternoon Tea Sandwiches, Grilled Bombay Sandwich, and Veg Grilled Cheese Sandwich.
    • Chicken Seekh Kebabs and tandoori chicken.
    • Bhel - I've used it in my Quinoa Bhel and Bhel Puri Recipe with Chana.
    • Kathi Rolls - as seen in my Paneer Tikka Kathi Roll and Achari Aloo Kati Roll.
    • Indian fried rice - add a couple of dollops of chutney when making Desi fried rice. Throw in some peas, corn, and carrots.
    • Eggs - Of course, chutney egg and cheese are delicious.
    • Pasta - Delicious with mac and cheese.
    • Salad Dressing - throw in some chutney, olive oil, salt, and black pepper.

    Frequently Asked Questions

    1. How long does Dhaniya Chutney last?

    Chutney will last up to 4 days in the fridge. 

    Coriander Chutney also freezes really well, so if you have no intentions of finishing your batch of homemade chutney, simply freeze it. To freeze, I love using ice cube trays to freeze my chutney. When you're ready to use, I place a couple of chutney cubes in a bowl and into the fridge overnight. It'll be ready for use the next day.

    2. Can I add yogurt to Cilantro Chutney?

    Yes. I do this for my husband and son all the time as they can't handle too much spice. Just add yogurt and you'll end up with a beautiful light green chutney.


    More Recipes

    • Summer Afternoon Tea Sandwiches (egg salad chutney, watercress cucumber, jam cheese)
    • Bhel Puri with Chana featuredimage
      Bhel Puri Recipe with Chana (Healthy Bhel)
    • PANEER KATHI ROLL
      Paneer Kathi Roll (vegetarian, gluten-free option)
    • Afternoon Tea Party Sandwiches featured
      Afternoon Tea Party Sandwiches (Indian-inspired)

    📖 Recipe Card

    Cilantro Chutney featured image
    Print Recipe
    5 from 4 votes

    Cilantro Chutney

    Cilantro Chutney is a staple condiment in every Indian household that's made with fresh cilantro, lemon juice, ginger, garlic, green chilies, peanuts, and more. Cilantro Chutney is delicious with samosas, kebabs, and sandwiches.
    Prep Time10 minutes mins
    Total Time10 minutes mins
    Course: Sauces
    Cuisine: Indian
    Servings: 12 servings
    Calories: 11kcal
    Author: Nisha

    Ingredients

    • 1 clove garlic
    • ½ inch piece ginger
    • ¼ teaspoon salt
    • ½ teaspoon cumin seeds
    • 1 tablespoon lemon juice
    • 2 tablespoon red onion chopped
    • 1 tbsp raw unsalted peanuts or cashews
    • ½ teaspoon sugar
    • 2 green chilles
    • ½ cup ice cubes
    • 1 fresh bunch cilantro
    • little water, if need be

    Instructions

    • Add fresh cilantro leaves to a blender. I love The Beast Blender.
    • Add the remaining ingredients to the blender. Water is optional - add 2 tablespoons of water, if need be.
    • Blend until the chutney has a smooth consistency.
    • Your chutney is ready.

    Video

    Notes

    This post was first published on August 16, 2022, and has been updated since.
    • To make smooth cilantro chutney, invest in a good blender such as The Beast Blender which I highly recommend because it's cute and compact. Other great options are BlendTec or Vitamix. Additionally, I don't recommend using a food processor.
    • Add 2 tablespoons of water, if need be, to get the blender going. Feel free to add more water for your desired consistency.

    Nutrition

    Calories: 11kcal | Carbohydrates: 1g | Protein: 1g | Fat: 1g | Saturated Fat: 1g | Sodium: 62mg | Potassium: 16mg | Fiber: 1g | Sugar: 1g | Vitamin A: 12IU | Vitamin C: 1mg | Calcium: 3mg | Iron: 1mg
    Bhel Puri with Chana featuredimage

    July 19, 2023 Dairy-Free

    Bhel Puri Recipe with Chana (Healthy Bhel)

    Bhel Puri Recipe with Chana is a popular Indian Street Food that is made with murmura (puffed rice), onions, tomatoes, chutneys, spices, dry roasted peanuts, and chickpeas. This healthy bhel recipe is made without the traditional bhel mix so you can have bhel puri whenever you want.

    Bhel Puri with Chana image

    Growing up, on days my mom didn't feel like cooking, we would make bhel puri chaat, or any form of chaat really. The combination of sweet, spicy, and tangy chutneys, and veggies with a crunch is so satisfying.

    My mom would always try and make chaat healthier for us by adding ingredients such as yogurt, chickpeas, and nuts, and skipping the fried stuff. There are so many ways to eat better without losing the flavor.


    [feast_advanced_jump_to]

    What is Bhel Puri with Chana

    Bhel Puri is an Indian Street Food that's highly popular on the streets of Mumbai. You will find bhel puri often served at the roadside stalls in India, Haldiram's, and on beaches of Mumbai.

    This Indian snack is typically made with traditional bhel mix or crispy papdi which are crispy flat puris, murmura which is puffed rice, an assortment of veggies, spicy & tangy chutneys, ground spices, fresh cilantro, and sev (crunch noodles made with chickpea flour). The best part is, this easy recipe can be made in under 30 minutes. 

    For my healthy version, I added chickpeas and skipped the bhel mix and papdi. I also added roasted peanuts and topped this dish with papad (a thin Indian cracker that's flavored with spices). This wet bhel puri (also known as gheela bhel) is gonna make your taste buds dance. Enjoy this perfect snack as an appetizer, snack, or even a meal.

    Bhel Puri with Papad

    Why You Will Love Recipe

    • A Healthy Bhel Puri without any of the fried stuff
    • Delicious & Flavorful
    • Hits the Spot
    • A great option for Make-Ahead meal
    • Vegan & Gluten-free Appetizer/Snack

    Ingredients

    • Murmura: Murmura is known as puffed rice in English. They can be found at your local Indian grocery store or even the regular grocery stores. Here are some brands I recommend here and here.
    • Potatoes: I like using gold potatoes or russet potatoes for this recipe. Make sure you boil the potatoes and then peel & cube them.
    • Chickpeas: Not traditonally added to bhel puri, but chickpeas adds some protein and fiber. I like using organic canned chickpeas - rinsed & drained. Feel free to use dry chickpeas that you will need to soak overnight and then cook.
    • Veggies: Onions & Tomatoes - both chopped.
    • Tamarind Chutney: You can easily find delicious Tamarind Chutneys in the store so I don't bother making it. Laxmi and Deep make excellent tamarind chutneys. Any sweet chutney will work - even date chutney.
    • Cilantro Chutney: I make fresh coriander chutney at home. Here is the recipe for my spicy green chutney. You can use mint chutney instead.
    • Peanuts: I use unsalted peanuts that I dry roast. You can find these unsalted peanuts at the Indian store.
    • Lemon: You'll need to add freshly squeezed lemon juice. Alternatively, lime juice works too!
    • Spice Powders: You'll need Red Chili Powder, Chaat Masala which adds a nice tangy taste, and Black Salt.
    • Fresh Cilantro Leaves: You'll need fresh cilantro/coriander leaves for this recipe.
    • Sev: Fine sev or bhujia sev is optional. You can find this at your local Indian store.
    • Papad: I like using Jeera Papad which I bake in the toaster oven for a few minutes.

    How to Make Bhel Puri Recipe with Chana - Step by Step Instructions

    1. In a large mixing bowl, add the dry ingredients first starting with murmura (crispy puffed rice).

    2. Now add the diced boiled potatoes.

    3. Add the chickpeas. If you're using canned chickpeas, make sure they're washed, rinsed, and drained.

    4. Add the chopped onions.

    Add Murmura Potatoes Chickpeas steps 1-4

    5. Next add the wet ingredients starting with the chopped tomatoes.

    6. Add the chutneys - tamarind chutney and cilantro chutney. I used store-bought tamarind chutney and used my recipe for homemade cilantro chutney.

    7. Add the spices - chat masala, kala jeera (roasted cumin powder), and red chili powder.

    8. Now add some chopped fresh cilantro.

    Add Tomatoes Onions Chutneys Steps 5-8

    9. Mix everything well. Add the dry roasted peanuts.

    10. A squeeze of fresh lemon juice. Mix well.

    11. Transfer the healthy bhel to a serving platter and top with fine sev.

    12. For garnish - top with papad which adds a really nice touch. Additionally, you may also garnish with pomegranate seeds. Enjoy this bhel recipe at room temperature.

    Add Peanuts Mix Well Steps 9-12

    Expert Tips

    ✓ Prep your ingredients in advance.

    ✓ Store-bought sweet tamarind chutney works just fine!

    ✓ Make this dish right before serving to prevent the murmura from getting soggy.

    Serving Suggestions

    → Serve this delicious evening snack with some papad on top. It also gives this dish a wow factor.

    → A cup of masala chai is always a winner with chaat.


    Variations

    This is a healthy bhel puri, however if you'd like a more traditional Bhel Puri, feel free to add half murmura and half bhel mix along with some crispy papdi.. Note: modifying the recipe will change the nutrition information of the original.


    Storage

    Bhel Puri will get soggy in the refrigerator, my recommendation is to store each ingredient individually, such as the tomatoes, onions, chickpeas, and chutneys.

    This healthy snack is great for meal prepping so you can prep your ingredients in advance and make Bhel Puri when your heart desires.


    Frequently Asked Questions

    1. Is Healthy Bhel Puri vegan?

    Yes. This recipe is completely vegan.

    2. Is Bhel Puri with Chana gluten-free?

    Yes. This recipe is gluten-free.

    3. Can I use dry chickpeas instead of canned chickpeas?

    Absolutely! You can soak the dry chickpeas overnight and cook them the next day in the Instant Pot or pressure cooker.

    4. What else can I use instead of chickpeas?

    You can use black beans, kidney beans, or even cannellini beans. They're all a good source of protein and fiber.

    5. What can I substitute for murmura?

    If you don't want to use murmura, there are many other options. Feel free to add bhel mix, papdi, chivda, tortilla chips, corn flakes, rice krispies cereal or papad to your bhel puri. Basically, anything crunchy as a base will work!

    6. What other veggies can I add to this Healthy Bhel Puri?

    For a more hearty bhel puri, feel free to add chopped bell peppers, cucumbers, or cabbage. Furthermore, you can also add raw mangoes - chopped.

    7. How can I make Bhel Puri even spicier?

    For spicy flavors, go ahead and add some chopped green chilies or serrano peppers for a spicier bhel. Feel free to add red garlic chutney if you wish.

    Healthy Bhel Puri

    More Chaat Recipes

    • Quinoa Bhel Salad
      Quinoa Bhel Salad (vegan, healthy-ish)
    • papdi chaat
      Papdi Chaat (vegetarian)
    • ALOO TIKKI CHAAT
      Aloo Tikki Chaat (not fried)
    • Corn Chaat Kachumber Salad (vegan)

    Tried this recipe? If so, please leave a comment & rate this recipe. That would mean so much to me. If you’re on Instagram, please tag me so I can see your creations. I'm happy to share and mention you. Thank you!


    📖 Recipe Card

    Bhel Puri with Chana featuredimage